
To fix a bike chain that keeps falling off, identify any loose or damaged links, adjust the tension, and ensure proper alignment of the derailleurs and gears. A bike chain falling off can be frustrating and even dangerous, especially if it occurs while you’re riding.
But fear not, because there are simple steps you can take to fix this issue. In this article, we will guide you through the process of fixing a bike chain that keeps falling off. Whether you’re an experienced cyclist or a beginner rider, these tips will help you get your chain back in working order.
By following these steps, you can enjoy a smooth and trouble-free cycling experience without any fear of the chain derailing. So, let’s dive in and get your bike chain fixed!
Credit: www.davestravelpages.com
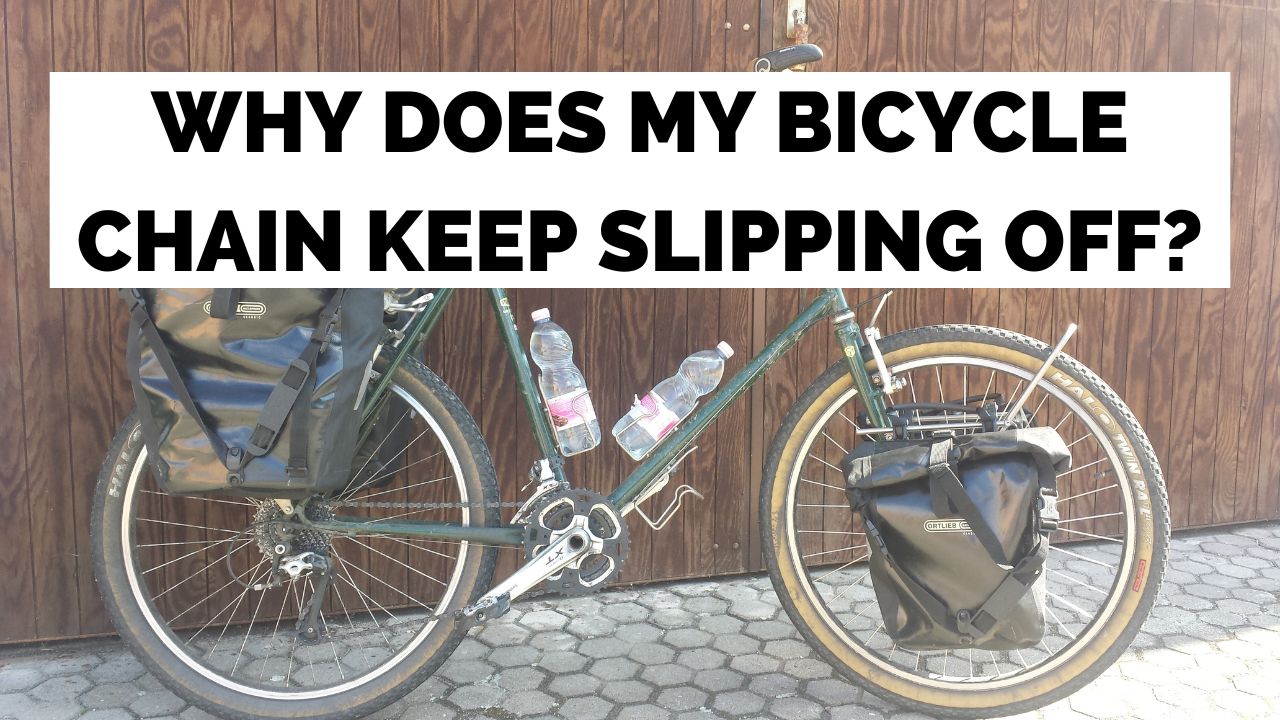
Reasons Why Your Bike Chain Keeps Falling Off & How To Fix
Is your bike chain constantly falling off while you’re riding? It’s not only annoying but also can be dangerous. Don’t worry, though, because there are several reasons why this might be happening, and luckily, most of them have relatively simple fixes.
In this section, we will explore some of the common causes of a bike chain falling off and provide you with practical solutions to get you back on the road in no time. Let’s dive in!
Misalignment Of The Rear Derailleur
- The rear derailleur is a crucial component of your bike that helps shift the chain across different gears.
- When it is misaligned, it can cause the chain to fall off while riding.
- To fix this issue, follow these steps:
- Shift the chain to the smallest rear gear.
- Loosen the fixing bolt on the rear derailleur and realign it using your hand.
- Tighten the fixing bolt securely once the derailleur is aligned properly.
Loose Chain Tension
- If your bike chain is not properly tensioned, it may fall off frequently.
- Insufficient tension can be caused by a stretched chain or an improperly adjusted rear derailleur.
- To fix this issue, follow these steps:
- Shift to the smallest rear gear and smallest front chainring.
- Loosen the rear wheel nuts slightly and pull the rear wheel backward to increase chain tension.
- Retighten the rear wheel nuts firmly once the chain tension is appropriate.
Worn Chain Or Chainrings
- Over time, chains and chainrings can wear out, affecting their ability to engage properly.
- A worn chain or chainring can lead to frequent chain drops.
- To fix this issue, follow these steps:
- Measure your chain for wear using a chain checker tool.
- If the chain is worn beyond a certain point, consider replacing it.
- Inspect the chainrings for signs of wear, such as hooked or worn-out teeth, and replace if necessary.
Incorrect Chain Length
- Using an incorrectly sized chain can also contribute to chain dropping issues.
- A chain that is too short or too long can disrupt the smooth functioning of the drivetrain.
- To fix this issue, follow these steps:
- Determine the correct chain length for your bike by referencing the manufacturer’s guidelines or consulting a bike mechanic.
- If the chain is too short, you may need to add additional links.
- If the chain is too long, remove the excess links using a chain tool.
These are just some of the reasons why your bike chain may keep falling off and the corresponding fixes. By addressing these issues, you can enjoy a smoother and more worry-free biking experience. Remember to regularly maintain your bike and address any potential problems promptly to ensure optimal performance.
Happy riding!
1. Loose Screws/Bolts On Drivetrain
A loose bike chain can be frustrating, especially if it keeps falling off while you’re riding. One of the common causes of this issue is loose screws or bolts on the bike’s drivetrain. The drivetrain consists of the chainrings, cassette, rear derailleur, and associated bolts.
When these screws or bolts become loose, the bike chain may not stay in place, leading to it falling off frequently. To fix this problem, follow these steps:
- Inspect the drivetrain components for any loose screws or bolts.
- Use a wrench or allen key to tighten the loose screws or bolts.
- Make sure to tighten them adequately, but avoid overtightening, as it can damage the components.
- Double-check the tightness of all the screws and bolts to ensure they are secure.
- Test the bike by riding it gently, checking if the chain stays in place during shifting and pedaling.
Remember, regularly inspecting and maintaining your bike’s drivetrain can prevent loose screws or bolts and ensure a smooth cycling experience. By fixing this issue, you can minimize the chances of your bike chain falling off during rides.
2. Stretched Chain
A common reason why a bike chain keeps falling off is due to it being stretched. Over time, the chain can become elongated, causing it to slip or jump off the gears. This can happen as a result of regular wear and tear or improper maintenance.
Here are a few key points to consider when dealing with a stretched chain:
- Regular chain maintenance is crucial to prevent it from stretching. Cleaning and lubricating the chain regularly can help maintain its proper tension and reduce the chances of it falling off.
- If you notice your chain is stretched, it may be necessary to replace it. A stretched chain can cause further damage to the gears, leading to a more costly repair in the long run.
- To determine if your chain is stretched, you can use a chain wear indicator tool or measure the distance between the pins. If the measurement exceeds the recommended limit, it’s time for a replacement.
- When installing a new chain, make sure it is the correct length. A chain that is too long or too short can increase the risk of it falling off.
- Proper shifting techniques can also help prevent a stretched chain. Avoid shifting gears under heavy load or putting excessive strain on the chain.
Remember, a stretched chain should not be neglected as it can compromise your safety and affect your cycling experience. By addressing the issue promptly and taking preventive measures, you can keep your chain in optimal condition and enjoy a smoother ride.
3. Is Your Road Bike Chain Too Long?
A common reason why a bike chain keeps falling off is if it is too long. When a chain is too long, it may not fit properly on the teeth of the gears, causing it to slip off. To ensure a properly functioning chain, follow these steps:
- Check the chain length: The chain should be the appropriate length for your bike. Refer to the manufacturer’s guidelines or consult a bike professional to determine the correct chain length.
- Adjust the chain tension: Use a chain tensioner or derailleur to adjust the tension of the chain. It should be taut, but not too tight. This will help prevent the chain from falling off.
- Remove excess links: If the chain is visibly longer than it needs to be, you may need to remove a few links. This can be done using a chain tool. Be careful not to remove too many links, as this can result in a chain that is too short.
By addressing the issue of a chain that is too long, you can prevent it from constantly falling off and ensure a smoother and safer ride.
4. What happens if your chain is dirty?
Biking is a great way to exercise and enjoy the outdoors, but it can be frustrating when your bike chain keeps falling off. One of the common reasons for this issue is a dirty chain. When dirt, grime, and debris accumulate on your bike chain, it can affect its performance and cause it to derail easily.
In this section, we will explore how to fix a bike chain that keeps falling off due to dirt buildup.
Key Points:
- Regularly cleaning and lubricating your bike chain is essential to prevent it from getting dirty and causing issues.
- Use a degreaser to remove the existing dirt and grime from the chain. Apply the degreaser to a brush or a rag and scrub the chain thoroughly.
- After cleaning, rinse the chain with water and dry it thoroughly. Make sure there is no moisture left on the chain to avoid rusting.
- Apply a suitable bicycle chain lubricant to the chain. Choose a lubricant that is specifically designed for bike chains and apply it evenly on all the moving parts.
- Wipe off any excess lubricant to prevent attracting more dirt and debris.
- It’s essential to clean and lubricate your bike chain regularly, especially after riding in muddy or dusty conditions.
- Consider using chain covers or guards to protect your chain from external elements and reduce the chances of it getting dirty.
- Keep your bike stored in a clean and dry area to minimize the exposure to dirt and dust.
Remember, a clean and well-lubricated chain is crucial for smooth and efficient biking. By following these steps to tackle a dirty chain, you can fix the problem of your bike chain constantly falling off. Happy riding!
5. How to fix a stiff chain link
If you’ve ever experienced a stiff chain link on your bike, you know how frustrating it can be. Not only does it affect your ride quality, but it can also lead to your chain falling off more frequently. Luckily, there are steps you can take to fix this issue and get your bike chain working smoothly again.
Here are some key points to keep in mind when dealing with a stiff chain link:
- Inspect the chain: Start by visually inspecting the chain to identify the stiff link. Look for any signs of rust, dirt, or debris that may be causing the stiffness.
- Apply lubricant: Use a bike-specific chain lubricant to free up the stiff link. Apply the lubricant generously and make sure it penetrates the affected area.
- Work the link: Once you’ve applied the lubricant, gently flex the stiff link back and forth to loosen it up. Use your fingers or a pair of pliers to bend it slightly if necessary.
- Clean the chain: If the stiffness is caused by dirt or debris buildup, you may need to clean the entire chain. Use a chain cleaning tool or a brush to remove any grime and ensure smooth movement.
- Test the chain: After working on the stiff link, give it a test run. Shift through the gears and pedal the bike to ensure that the chain moves freely without any resistance.
Fixing a stiff chain link may require a bit of patience and effort, but it’s an essential step in preventing your chain from falling off. By following these steps, you can keep your bike’s chain operating smoothly and enjoy a hassle-free ride.
6. How to face Worn Cassette Cogs/Teeth issue
Fixing a bike chain that keeps falling off can be a frustrating experience, especially if you’re in the middle of a ride. One of the key culprits for a chain repeatedly coming off is worn cassette cogs or teeth. When the teeth on your cassette become worn down, they can no longer effectively grip the chain, leading to slips and skips.
If you’re facing this issue, fear not! There are steps you can take to resolve it and get your chain running smoothly once again. Below, we’ll outline the key points to keep in mind when dealing with worn cassette cogs or teeth.
Identifying The Problem:
- Inspect your cassette closely, looking for signs of wear and tear on the teeth.
- Look for any teeth that appear to be pointed or with a “shark fin” shape, indicating excessive wear.
Steps To Fix The Issue:
- Replace the worn cassette with a new one. This is the most effective solution and ensures optimal performance.
- Make sure to choose a cassette with the correct number of gears to match your bike’s setup.
- Carefully remove the old cassette using a cassette lockring tool.
- Clean the freehub body, removing any debris or grime that may have accumulated.
- Install the new cassette, aligning it properly with the splines on the freehub body.
- Use the lockring tool to securely fasten the cassette onto the freehub.
With these steps, you should be able to address the problem of worn cassette cogs or teeth and put an end to your chain falling off. Remember to always maintain your bike and check for any signs of wear regularly.
By ensuring proper upkeep, you can extend the life of your components and enjoy a smooth and hassle-free ride.
7. What to do if Misaligned Derailleurs happen
If you’ve been experiencing issues with your bike chain constantly falling off, one possible culprit could be misaligned derailleurs. The derailleurs are responsible for shifting the chain between different gears, and if they are not properly aligned, it can cause the chain to jump off the cassette or chainrings.
Here are a few key points to consider when dealing with misaligned derailleurs:
- Check the alignment: Look closely at the derailleurs to ensure they are in line with the cassette and chainrings. They should be perfectly parallel to these components, and any deviation could lead to chain slippage.
- Adjust the barrel adjuster: The barrel adjuster is a small knob located on the derailleur or shifter. By turning it, you can fine-tune the alignment of the derailleur. Experiment with clockwise and counterclockwise rotations to see if it helps resolve the issue.
- Evaluate cable tension: In some cases, the misalignment may be caused by improper cable tension. If the cable is too loose or too tight, it can throw off the derailleur’s positioning. Use the barrel adjuster to make small adjustments to the tension until the derailleur aligns correctly.
- Seek professional help if needed: If you’ve tried these adjustments but are still struggling with misaligned derailleurs, it might be best to take your bike to a professional bike shop. They have the expertise and specialized tools to diagnose and fix more complex issues.
Remember, a chain that continuously falls off can be frustrating and even dangerous, especially during rides. By addressing misaligned derailleurs, you can minimize the chances of encountering this problem and enjoy a smoother cycling experience.
8. Low-Quality Shifters
If you find that your bike chain keeps falling off, one possible reason could be low-quality shifters. Shifters are responsible for moving the chain from one gear to another. Here are some key points to consider:
- Shifters that are of low quality may not provide smooth and precise shifting, which can lead to the chain falling off.
- Low-quality shifters may not hold the chain securely in place, resulting in frequent chain drops.
- Sometimes, the shifters may not properly align the chain with the gears, causing it to derail and fall off.
If you suspect that low-quality shifters are causing your chain to repeatedly fall off, here are a few steps you can take to fix the issue:
- Consider upgrading your shifters to higher-quality ones. Explore options that are known for their durability, precision, and reliability.
- Ensure that your shifters are properly installed and adjusted. If needed, consult the bike’s user manual or seek professional assistance to ensure correct installation.
- Regularly clean and lubricate your shifters to maintain their optimal performance. This will help prevent any sticky or sluggish shifting that can result in chain drops.
- Check the cables and housing connected to your shifters. Damaged or worn-out cables can hinder smooth shifting and increase the risk of chain derailment.
By addressing the issue of low-quality shifters, you can greatly reduce the chances of your bike chain falling off frequently. Invest in quality components and properly maintain your bike’s shifting system to ensure a smooth and hassle-free riding experience.
9. Bumps
Bike chains are essential for smooth and efficient cycling. However, there are situations where the chain keeps falling off, interrupting your biking experience. One common cause for this issue is encountering bumps on the road. ### here are a few key points to keep in mind:
- Bumps can cause the bike chain to become dislodged from its intended position on the chainring or cassette.
- When riding over bumps, the chain may come off if it is not properly tensioned or if there is excessive slack.
- Proper maintenance, such as regular cleaning and lubrication, can help prevent the chain from falling off when encountering bumps.
- Adequate chain tension is crucial to ensure it remains in place during bumpy rides. Check the tension and make adjustments as necessary.
- Ensure that the chainring and cassette are aligned correctly and are not worn, as this can also contribute to the chain falling off.
- When riding over bumps, it’s important to avoid sudden, jarring movements that can potentially dislodge the chain.
- A well-maintained bike and chain will be more reliable when faced with bumps on the road.
- If the chain continues to fall off despite proper maintenance, consider getting it examined by a professional bike mechanic to diagnose any underlying issues.
Remember, encountering bumps while cycling can lead to a chain that keeps falling off. By following these tips and maintaining your bike properly, you can minimize the chances of this frustrating problem occurring. Whether you’re a casual cyclist or an avid bike enthusiast, smooth and uninterrupted rides are within reach even when faced with bumps on the road.
Easily Fix A Mountain Bike Chain That Keeps Coming Off
Do you love hitting the trails on your mountain bike, but find that your chain continuously derails? Don’t let this frustration hold you back from enjoying your favorite outdoor activity. With a few simple steps, you can easily fix a mountain bike chain that keeps coming off.
Whether you’re an experienced rider or new to the sport, these tips will help you keep your chain in place and prevent any unexpected stops on your next adventure.
Check For Proper Chain Tension And Alignment
To ensure your chain stays on track, it’s essential to make sure it is properly tensioned and aligned. Here’s what you need to do:
- Check chain tension: A loose chain can easily slip off the chainrings or derailleur. Ideally, the chain should have a slight amount of slack, but not too loose. Find the sweet spot by gently pulling the chain away from the chainrings – it should move about half an inch.
- Align the chain: Misaligned rear derailleur or derailleur hanger can cause the chain to fall off frequently. Inspect the alignment and make necessary adjustments to ensure the derailleur and derailleur hanger are in proper alignment.
Clean And Lubricate Your Chain Regularly
Dirty and dry chains can increase the chances of chain derailment. By giving your chain some tlc, you can minimize the risk of it coming off. Follow these steps:
- Clean your chain: Use a chain cleaning tool or a rag soaked in degreaser to remove dirt, grime, and debris from your chain. Ensure you clean each link thoroughly.
- Lubricate your chain: After cleaning, apply a high-quality bicycle chain lubricant to ensure smooth movement. Be sure to wipe off any excess lubricant to prevent attracting more dirt.
Check For Worn Chain Or Chainring
Over time, chains and chainrings can become worn, leading to poor performance and frequent chain drops. Keep an eye out for signs of wear, such as elongation or shark tooth-shaped chainrings. Consider the following steps:
- Inspect chain wear: Use a chain wear indicator tool to check for chain elongation. If the chain is excessively worn, replace it with a new one promptly.
- Evaluate chainring condition: Inspect the chainring teeth for signs of wear and damage. If the teeth are worn down or bent, it’s time to replace the chainring.
Adjust The Limit Screws On Your Derailleur
Misadjusted limit screws on your derailleur can cause the chain to fall off the cassette. Here’s how to fix it:
- Identify the limit screws: Locate the high and low limit screws on your derailleur. These screws control the movement of the derailleur and prevent the chain from falling off the cassette.
- Make necessary adjustments: Use a screwdriver to turn the limit screws clockwise or counterclockwise to fine-tune the movement of the derailleur. Ensure the derailleur shifts smoothly through all gears without overshift or chain drop.
By following these simple steps, you can easily fix a mountain bike chain that keeps coming off. Remember to regularly maintain your chain, check for wear, and make necessary adjustments to keep your bike running smoothly. Now, get back on the trails and enjoy your ride without worrying about derailing your chain!
Tips & Tricks For Mountain Biking Enthusiasts
Mountain biking enthusiasts know the thrill of navigating rugged terrains and conquering challenging trails. However, one common issue that can dampen the experience is a bike chain that keeps falling off. This can be frustrating and even dangerous if it happens during a ride.
The good news is that there are tips and tricks that can help you fix this problem and ensure a smooth and uninterrupted ride. So, if you’re tired of constantly having to put your chain back on, read on to discover some practical solutions.
Proper Chain Tension
- Maintaining the correct tension in your bike chain is crucial to prevent it from falling off.
- Check the tension by lifting the chain at its midpoint. It should have a slight amount of play, around half an inch.
- If the chain is too loose or too tight, it can easily derail. Adjust the tension using the derailleur by turning the barrel adjuster.
Chain Cleaning And Lubrication
- A dirty or dry chain can contribute to chain drop.
- Regularly clean your chain using a degreaser and a brush to remove dirt and grime.
- After cleaning, apply a suitable chain lubricant to ensure smooth movement and prevent friction that can lead to chain drop.
Proper Gear Shifting
- Improper gear shifting can cause the chain to fall off.
- Always anticipate gear changes, especially when approaching steep climbs or descents.
- Shift smoothly and avoid sudden or forceful shifts, as they can cause the chain to derail.
Chainring Inspection
- The condition of your chainring can also affect chain stability.
- Check for any signs of wear or damage, such as bent or missing teeth.
- If necessary, replace the chainring to ensure a secure connection between the chain and the crankset.
Chain Length
- An incorrectly sized chain can increase the likelihood of chain drop.
- Ensure that your chain is properly sized for your bike.
- If the chain is too long, it may come off more easily. If it’s too short, it can put strain on the drivetrain and lead to chain drop.
Derailleur Adjustment
- A misaligned or poorly adjusted derailleur can contribute to chain drop.
- Check the alignment and adjust as necessary.
- Make sure the derailleur is properly calibrated to ensure smooth and accurate shifting.
Chain Retention Device
- Consider using a chain retention device, such as a chain guide or a chainring with a narrow-wide tooth profile.
- These devices help keep the chain in place, reducing the likelihood of it falling off.
Frame Alignment
- A misaligned frame can cause chain drop.
- Check that your frame’s dropouts are aligned properly.
- If you notice any misalignment, consult a professional bike mechanic for assistance.
Riding Technique
- Lastly, pay attention to your riding technique.
- Pedal smoothly and avoid sudden movements or excessive force that can put strain on the chain.
- Stay focused and maintain control over your bike to reduce the likelihood of the chain falling off.
By implementing these tips and tricks, you can minimize the occurrence of a bike chain that keeps falling off. Remember to regularly inspect and maintain your bike’s components to ensure optimal performance and a safer riding experience. So, gear up, hit the trails, and enjoy the adrenaline rush of mountain biking with confidence!
5 Common Chain Issues That Explain Why Your Bike Chain Keeps Falling Off
No matter how experienced of a cyclist you are, dealing with a bike chain that keeps falling off can be frustrating. Not only does it disrupt your ride, but it can also be dangerous if it happens unexpectedly. Luckily, there are several common chain issues that could explain why your bike chain keeps falling off.
Understanding these issues is the first step toward finding a solution and getting back to smooth and uninterrupted cycling. Let’s dive into the main culprits behind this problem.
Chain Misalignment:
- Improper alignment of the chain can cause it to fall off frequently.
- One of the main reasons for misalignment is a bent derailleur hanger.
- Another cause could be a misaligned front or rear derailleur.
Chain Tension:
- Insufficient or excessive chain tension can lead to chain slippage.
- If the chain is too loose, it may fall off during rapid gear changes or bumpy terrain.
- Conversely, a chain that is too tight can also cause the chain to derail.
Worn Chain Or Cogs:
- Over time, chains and cogs wear out and develop irregularities.
- A worn chain may not fit properly on the cogs, causing it to fall off.
- Check for signs of stretching or visible wear on your chain and cogs.
Dirty Or Dry Chain:
- A chain that is not properly lubricated can become stiff and prone to falling off.
- Dirt and grime build-up can also hinder smooth movement of the chain.
- Regular cleaning and lubrication can help maintain chain performance.
Damaged Chain Links:
- Broken or damaged chain links can lead to chain failure.
- Look out for bent, twisted, or cracked links that may compromise the chain’s integrity.
- Replace any damaged chain links promptly.
By identifying the specific issue behind your bike chain falling off, you can take the necessary steps to fix the problem and prevent further occurrences. In the following sections, we will explore each of these common chain issues in more detail, along with practical solutions to help you get your bike chain back on track.
Stay tuned for expert guidance on troubleshooting and resolving these chain-related obstacles in your cycling journey.
How To Tighten A Stretched Chain
A bike chain that keeps falling off can be frustrating and even dangerous. One common cause for this issue is a stretched chain. Over time and regular use, a bike chain can stretch, causing it to slip off the gears.
However, tightening a stretched chain is a relatively simple process that can get your bike back on track. In this guide, we will walk you through the steps on how to tighten a stretched chain effectively.
Checking Chain Wear
Before tightening a stretched chain, it’s essential to check for chain wear. A worn-out chain may not respond well to tightening and might need replacement. Here’s how to check the wear on your bike chain:
- Find a ruler or a chain wear indicator tool.
- Place the ruler or tool against the chain, aligning the first pin of the chain with the zero marking.
- Observe the location of the 12-inch marking on the ruler or the tool. If the first pin lines up with the 12-inch marking or is beyond it, it’s time to replace the chain.
Adjusting Chain Length
To tighten a stretched chain, you can adjust the chain length by moving the rear wheel backward slightly. Follow these steps:
- Loosen the nuts or quick-release lever on the side of the rear wheel axle.
- Hold the rear wheel firmly and gently pull it backward in the dropouts, tightening the chain.
- Ensure that the wheel is centered and straight within the bike frame.
- Tighten the nuts or close the quick-release lever, securing the rear wheel in place.
Checking Chain Tension
After adjusting the chain length, you need to check the chain tension. Proper chain tension is crucial to minimize the risk of the chain falling off again. Here’s how to check the tension:
- Push down on the pedal while lifting the rear of the bike off the ground.
- Observe the amount of chain sag. A properly tensioned chain should have approximately half an inch of sag in the middle.
- If the chain is too loose or too tight, repeat the process of adjusting the chain length until the tension is correct.
Lubricating The Chain
Once you have tightened the chain and checked its tension, remember to lubricate it. A well-lubricated chain reduces friction and extends its lifespan. Follow these steps to lubricate your bike chain:
- Clean the chain using a degreaser and a chain cleaning tool.
- Dry the chain thoroughly before applying lubricant.
- Apply a few drops of chain lubricant to each individual roller of the chain.
- Rotate the pedals backward for a few revolutions to ensure the lubricant distributes evenly.
By following these steps, you can effectively tighten a stretched chain and prevent it from falling off during your bike rides. Remember to regularly inspect your chain for wear and maintain proper lubrication for optimal performance. Happy cycling!
How To Lengthen A Chain That Is Too Short Or Loosen A Chain That’S Too Tight
Fixing a bike chain that keeps falling off can be frustrating, but luckily there are solutions to this common issue. One of the main causes of a chain falling off is a chain that is either too short or too tight.
In this section, we will explore how to lengthen a chain that is too short and how to loosen a chain that’s too tight.
Lengthening A Chain That Is Too Short:
If you find that your bike chain is too short, follow these steps to lengthen it:
- Step 1: Locate the master link on your chain. This is a special link that can be easily removed.
- Step 2: Use a chain tool to push out the pin holding the master link in place.
- Step 3: Once the pin is removed, add additional links to the chain by connecting them to the master link.
- Step 4: Re-insert the pin into the master link using the chain tool, making sure it is secure.
- Step 5: Test the chain’s length by ensuring it has enough slack to move smoothly through the gears. Adjust if necessary.
Loosening A Chain That’S Too Tight:
If your bike chain is too tight, here’s how you can loosen it:
- Step 1: Locate the rear wheel axle nuts or quick-release lever.
- Step 2: Loosen the nuts or release the lever to give yourself some play in the chain.
- Step 3: Push the rear wheel away from the bike frame, allowing the chain to slacken.
- Step 4: Once you have the desired amount of slack, tighten the nuts or close the quick-release lever to secure the wheel in place.
- Step 5: Check the chain tension by pressing down on it midway between the front and rear sprockets. It should have about half an inch of movement.
By following these steps, you can effectively lengthen a chain that is too short or loosen a chain that’s too tight, ensuring that your bike chain stays in place and prevents it from falling off repeatedly. Remember to regularly check and maintain your chain’s tension to prevent any future issues.
Happy biking!
How To Clean A Dirty Chain
A dirty bike chain can lead to poor performance and even more frustratingly, frequent chain derailments. To keep your bike running smoothly and avoid any sudden chain mishaps, it’s important to clean your chain regularly. Cleaning a dirty chain is a simple task that can be done with just a few tools and some elbow grease.
Here’s how you can clean your bike chain effectively:
—
Use A Degreaser
Using a degreaser is the first step to getting your bike chain clean and free from built-up grime. Follow these steps to use a degreaser effectively:
- Apply the degreaser to a clean rag or brush and carefully run it along the bike chain.
- Focus on the areas with the most visible dirt and grease.
- Be sure to cover the entire chain to ensure a thorough cleaning.
Scrub The Chain
After applying the degreaser, it’s time to scrub away the dirt and grime from the chain. Here are a few steps to follow for effective scrubbing:
- Use a chain cleaning brush or an old toothbrush soaked in degreaser to scrub the chain.
- Move the brush back and forth along the entire length of the chain, ensuring you get into all the nooks and crannies.
- Press firmly but be careful not to damage any of the chain’s components.
Rinse The Chain
To remove any remaining residue from the degreaser and dirt, it’s essential to rinse the chain thoroughly. Here’s what you should do:
- Use a clean rag or sponge soaked in warm water to wipe away the degreaser and remaining grime.
- Ensure that you remove all traces of the cleaner from the chain.
- Wipe the chain dry with a clean, lint-free cloth.
Apply Chain Lubricant
After cleaning and drying the chain, the final step is to lubricate it properly. Follow these steps for a well-lubricated bike chain:
- Apply a few drops of chain lubricant onto the chain, focusing on the individual links.
- Use a rag or cloth to spread the lubricant along the entire length of the chain.
- Make sure that the lubricant reaches deep into the chain’s core.
By regularly cleaning your bike chain, you’ll enjoy smoother rides with a reduced risk of chain derailments. Plus, your bike’s overall performance will be greatly improved. So take some time to clean that dirty chain, and get back to enjoying the ride!
How To Fix Imperfect Chain Areas
When it comes to fixing a bike chain that keeps falling off, one of the most common issues you might encounter is imperfect chain areas. These areas can lead to a chain that slips, jumps, or derails altogether. Luckily, there are some simple steps you can take to fix these imperfect chain areas and ensure a smoother ride.
Identifying The Problem
Before diving into the solution, it’s important to identify the imperfect chain areas causing the problem. Here are some key points to consider:
- Look for any bent or damaged chain links that may be causing the chain to come off frequently. Damaged links can create weak points and disrupt the overall chain tension.
- Check the chainring and rear cassette for any signs of wear or damage. If these components are worn out, they may not provide sufficient grip on the chain, resulting in frequent chain slippage.
- Assess the derailleur alignment. Misalignment can cause the chain to rub against the derailleur and increase the chances of it coming off.
Rectifying Imperfect Chain Areas
Once you have identified the problem areas, it’s time to fix them. Here are some steps you can take:
- If you find any bent or damaged chain links, you can try using a chain tool to remove the affected link and replace it with a new one. Be sure to follow the manufacturer’s instructions and use a compatible replacement link.
- If the chainring or rear cassette shows signs of wear, it may be necessary to replace them. Consult a professional or refer to your bike’s user manual for guidance on proper replacement techniques.
- Adjust the derailleur alignment if it is misaligned. This can usually be done by fine-tuning the limit screws and cable tension. Again, consulting a professional or referring to your bike’s manual is recommended.
By addressing these imperfect chain areas, you can improve the overall performance and reliability of your bike’s chain. Remember to regularly inspect and maintain your chain to prevent future issues.
How To Replace A Worn-Out Chain
If your bike chain keeps falling off, it may be time to replace it with a new one. A worn-out chain not only affects your bike’s performance but can also lead to more serious problems down the line. Follow these steps to easily replace a worn-out chain and get your bike back in top shape:
Step 1: Gather The Necessary Tools
Before you begin the replacement process, make sure you have the following tools on hand:
- Chain breaker tool
- Replacement chain
- Chain lubricant
Step 2: Remove The Old Chain
To remove the old chain, perform the following steps:
- Shift the chain to the smallest chainring and smallest rear cog.
- Locate the master link or quick link on the chain, which is designed to be easily removable.
- Use the chain breaker tool to push the pin out of the link and separate the chain.
Step 3: Measure The New Chain
It’s important to ensure that the replacement chain is the correct length for your bike. Follow these steps to measure the new chain:
- Wrap the chain around the largest chainring and the largest rear cog.
- Pull the chain tight, making sure there is no slack.
- Add two links to the length and mark the chain with a pen or marker.
Step 4: Install The New Chain
Now it’s time to install the new chain onto your bike. Here’s how to do it:
- Begin by threading the new chain onto the smallest chainring and smallest rear cog, just like the old chain was before removal.
- Use the chain breaker tool to push the pin back into the master link, securing the chain in place.
- Check the chain tension and make sure it is properly aligned on the chainrings and rear cogs.
Step 5: Lubricate The New Chain
To ensure smooth operation and prevent premature wear, it’s crucial to lubricate the new chain. Use a chain lubricant specifically designed for bicycles and apply it evenly along the entire length of the chain, wiping off any excess.
With a fresh new chain in place, your bike should be ready to hit the road once again. Regularly inspect and maintain your chain to prevent future issues and enjoy a smooth and reliable ride.
Why The Chain Keeps Coming Off Your Bike When Changing Gears – And How To Fix It
Why The Chain Keeps Coming Off Your Bike When Changing Gears – And How To Fix It.
Do you find yourself frustrated every time you change gears on your bike, only to have the chain come off? It’s a common problem that can make your ride uncomfortable and even dangerous. Fortunately, there are a few reasons why this might be happening and some straightforward solutions to fix it.
Let’s dive into why your bike chain keeps falling off when changing gears and how you can resolve this annoying issue.
Chain Misalignment: A Common Culprit
One of the most common reasons for a bike chain falling off when changing gears is chain misalignment. This occurs when the chain isn’t properly aligned with the gears and can lead to it slipping off during gear changes. Some possible causes of chain misalignment include:
- Poor gear shifting technique: Shifting gears while putting excessive force on the pedals can cause the chain to skip and come off the gears.
- Bent derailleur hanger: A bent derailleur hanger can affect the alignment of the chain, leading to frequent chain drops. Inspect the derailleur hanger for any signs of damage or misalignment.
- Worn-out or loose chain: Over time, chains can stretch or become loose, causing them to deviate from the appropriate alignment. Regularly check and replace worn-out chains to maintain proper alignment.
Gear Shifting Timing: A Key Factor
Another reason why your bike chain keeps coming off when changing gears is incorrect shifting timing. Proper gear shifting requires precise timing and coordination between your pedaling and shifting. Common causes of poor shifting timing include:
- Shifting under load: Shifting gears while pedaling with excessive force can put stress on the chain and cause it to derail. Ease off the pedals slightly when shifting to avoid this issue.
- Shifting too quickly: Rapidly shifting gears without allowing the chain to engage properly can cause it to skip and come off. Take your time when shifting gears to ensure a smooth transition.
Insufficient Chain Tension: A Fixable Problem
Inadequate chain tension can also contribute to the chain falling off during gear changes. If the chain is too loose, it may not properly engage with the gears, resulting in frequent derailments. Check the chain tension and address the following factors if necessary:
- Incorrect rear derailleur position: Misaligned or improperly adjusted rear derailleur can affect the tension of the chain. Make sure the derailleur is properly positioned and aligned with the gears.
- Worn-out jockey wheels: The jockey wheels in the rear derailleur can wear out over time, leading to excessive chain slack. Regularly inspect and replace worn-out jockey wheels to maintain proper tension.
By addressing these potential issues, you can significantly reduce the likelihood of your bike chain falling off when changing gears. Ensure proper chain alignment, improve your shifting technique and timing, and maintain optimal chain tension to enjoy smoother and more reliable gear changes on your rides.
Happy cycling!
How To Check & Fix Bolt Problems
If you’re facing the frustrating issue of your bike chain constantly falling off, one possible culprit could be bolt problems. Bolts play a crucial role in keeping your bike chain secure and in place. In this section, we’ll explore how to identify and fix bolt problems that may be causing your chain to disengage.
Let’s jump right in!
Identify Loose Bolts
- A loose bolt can result in chain slippage. Here’s how to check for loose bolts:
- Inspect the bolts that secure the derailleur to the derailleur hanger. Ensure they are tightened securely.
- Examine the bolts that fasten the chainring to the crankset. Give them a gentle twist to verify they are snug.
Tighten Loose Bolts
- If you’ve identified any loose bolts, follow these steps to tighten them:
- Use an appropriately-sized hex wrench or allen key to tighten the loose bolts.
- Remember to apply force gradually and ensure not to overtighten, as this may damage the threads or strip the bolts.
Inspect And Replace Worn Bolts
- Over time, bolts can become worn or damaged, compromising their effectiveness in keeping the chain in place. Here’s how to assess and replace worn bolts:
- Check the bolts visually for signs of wear, such as rounding of the hex edges or visible threads.
- If you notice significant wear, it’s advisable to replace the bolts with new ones of the appropriate size and specifications, ensuring a secure fit.
Use Threadlocker For Added Security
- To provide additional security and prevent bolts from loosening over time, consider using threadlocker. Here’s how to apply it:
- Clean the bolts and their respective holes thoroughly.
- Apply a small amount of threadlocker to the threads of each bolt.
- Carefully tighten the bolts to the recommended torque specifications.
By regularly checking and fixing any bolt problems, you can ensure that your bike chain stays firmly in place, preventing the frustration of it constantly falling off. Remember to exercise caution and consult a professional if you’re uncertain about any repairs.
Now that we’ve covered bolt-related issues, let’s move on to the next topic: how to adjust a misaligned derailleur.
How To Check And Fix Cog Wear And Tear
Being a bike enthusiast is thrilling, but dealing with a bike chain that keeps falling off can be frustrating. Don’t worry, though, as we’ve got you covered. In this blog post, we’ll guide you on how to fix a bike chain that keeps falling off, focusing specifically on checking and fixing cog wear and tear.
So, let’s dive right in and get your bike back on track!
Checking For Cog Wear And Tear
Before you begin fixing your bike chain, it’s important to check whether the cog has any signs of wear and tear. Here are a few key points to keep in mind:
- Inspect the cog teeth: Take a close look at the teeth on the cog. Look for signs of wear, such as sharp or hooked edges, which can indicate that the cog needs to be replaced.
- Check for bent or misshapen teeth: Ensure that all the teeth on the cog are aligned properly. If you notice any bent or misshapen teeth, this could be the cause of your chain falling off.
- Measure the wear and tear: Use a wear indicator tool to measure the level of wear on your cog. If the measurements indicate significant wear, it’s time to replace the cog.
Remember to apply these steps periodically to prevent any unexpected chain issues when cycling. By understanding how to check and fix cog wear and tear, you’ll ensure a smoother ride and minimize the chances of your bike chain falling off.
Give these tips a try, and get ready to enjoy your biking adventures without any interruptions!
How To Replace A Shifter And Shifting Cables
If you’ve noticed that your bike’s chain keeps falling off while riding, it can be frustrating and potentially dangerous. One possible cause for this issue could be a faulty shifter or worn-out shifting cables. In this section, we’ll guide you through the process of replacing your shifter and shifting cables to help resolve this problem once and for all.
Steps To Replace A Shifter And Shifting Cables:
- Inspect the shifter: Start by examining the shifter to see if there are any visible signs of damage or wear. Look for cracks, bent parts, or frayed cables. If you notice any issues, it’s time to replace it.
- Gather the tools: Before you begin, make sure you have the necessary tools for the job. You’ll need a set of allen wrenches, cable cutters, new shift cables, and a replacement shifter if necessary.
- Remove the old shifter: Use the allen wrenches to remove the bolts that secure the shifter to the handlebars. Carefully detach the shifter from the handlebars and set it aside.
- Remove the shifting cables: Next, locate the shifting cables on your bike. Use the cable cutters to carefully snip the cables near the shifter and the derailleur. Remove the old cables from the bike.
- Install the new shifter: Take the new shifter and position it onto the handlebars. Align the bolt holes and use the allen wrenches to secure it in place.
- Install the new shifting cables: Begin by threading the new cables through the cable housing attached to the frame. Make sure they are properly seated and not tangled.
- Attach the cables to the shifter: Thread the cables through the appropriate holes on the new shifter. Follow the manufacturer’s instructions for the correct routing and tensioning of the cables.
- Attach the cables to the derailleur: Make sure the derailleur is in the proper position and adjust the barrel adjusters to fine-tune the shifting. Secure the cables to the derailleur, ensuring they are properly tensioned.
- Test the shifting: Before taking your bike for a ride, shift through all the gears to ensure smooth and accurate shifting. Make any necessary adjustments to the cable tension if needed.
- Final check: Once you’re satisfied with the shifting performance, double-check that all bolts are tightened securely, and there are no loose components.
By following these steps, you’ll be able to replace a shifter and shifting cables to address the issue of your bike chain constantly falling off. Remember to take your time and follow the manufacturer’s instructions for the specific components and model of your bike.
How To Fix A Bent Or Misaligned Derailleur Hanger
Having a bike chain that keeps falling off can be frustrating and can impede your biking experience. One potential cause of this issue is a bent or misaligned derailleur hanger. The derailleur hanger is a part of the bike frame that holds the derailleur in place, which in turn controls the movement of the chain.
If the derailleur hanger is bent or misaligned, it can cause the chain to fall off repeatedly. In this section, we will discuss how you can fix a bent or misaligned derailleur hanger effectively.
Steps To Fix A Bent Or Misaligned Derailleur Hanger:
- Identify the issue: Before you start fixing the derailleur hanger, it’s important to ensure that this is indeed the problem causing the chain to fall off. Check for any visible signs of damage or misalignment in the derailleur hanger.
- Remove the rear wheel: In order to access the derailleur hanger, you will need to remove the rear wheel of your bike. Follow the manufacturer’s instructions for removing the wheel safely.
- Inspect the hanger alignment: Use a derailleur hanger alignment tool or a straight edge to check the alignment of the hanger. Place the tool against the hanger and observe if it is straight or if it is bent or misaligned.
- Straighten the hanger: If the derailleur hanger is bent, you can attempt to straighten it. Be cautious while doing this, as excessive force can cause further damage. Gently apply pressure to realign the hanger, using a repair stand or holding the bike upside down for better access.
- Check alignment accuracy: After straightening the hanger, recheck the alignment using the derailleur hanger alignment tool. Ensure that it is now straight and properly aligned.
- Reinstall the rear wheel: Once you have straightened the derailleur hanger, carefully reinstall the rear wheel, making sure it is properly secured and aligned in the dropouts.
- Test the bike: Take your bike for a test ride to check if the chain stays in place. Shift through the gears and observe if the chain remains on the gears without slipping or falling off.
Remember, if you are unsure about fixing the derailleur hanger yourself, it is always advisable to seek assistance from a professional bike mechanic. They have the expertise and specialized tools to ensure a correct repair.
By following these steps, you can effectively fix a bent or misaligned derailleur hanger and eliminate the issue of your bike chain constantly falling off. Keep your bike in optimum working condition and enjoy a smooth and uninterrupted ride.
What To Do When The Chain Keeps Coming Off The Rear Derailleur
If you’re an avid cyclist, there’s nothing more frustrating than a bike chain that keeps falling off the rear derailleur. It not only disrupts your ride, but it can also be dangerous if it happens at the wrong moment. But fear not! In this section, we will explore some effective solutions to fix this pesky problem and get you back on the road in no time.
Check The Alignment Of The Rear Derailleur:
- Ensure that the rear derailleur is properly aligned and not bent or damaged. A misaligned or bent derailleur can cause the chain to come off frequently.
Adjust The Limit Screws:
- The limit screws on your rear derailleur play a crucial role in controlling the movement of the chain. By adjusting these screws, you can prevent the chain from shifting past the smallest and largest gears. This will help keep the chain in place.
Fine-Tune The Cable Tension:
- Another common cause of a chain falling off the rear derailleur is incorrect cable tension. If the tension is too loose, the chain may jump off when shifting gears. On the other hand, if the tension is too tight, the shifting may not be smooth. It’s important to find the right balance.
Inspect The Chain And Cassette:
- Regular maintenance and cleaning of your bike chain can significantly reduce the chances of it coming off. Check for any signs of wear or damage, such as bent or missing teeth on the cassette or stretched links on the chain. Replace any worn-out components as needed.
Proper Gear Shifting Technique:
- Sometimes, the chain comes off due to improper gear shifting technique. Make sure to shift gears smoothly and avoid sudden or forceful movements. Additionally, try to anticipate gear changes and shift before reaching a hill or a challenging section of the ride.
Maintain A Straight Chain Line:
- A chain that constantly falls off can also be a result of a misaligned chain line. Ensure that the rear wheel axle is properly aligned and that the chain runs straight from the front chainring to the rear cassette. This can be adjusted by repositioning the rear wheel if necessary.
Consider A Chain Guide Or Bash Guard:
- For riders who frequently encounter rough terrains or enjoy mountain biking, installing a chain guide or bash guard can provide extra protection and prevent the chain from bouncing off the rear derailleur. These accessories help keep the chain in place during intense rides.
By following these steps and implementing the necessary adjustments, you can put an end to the frustration of a bike chain that keeps falling off the rear derailleur. Remember to regularly inspect and maintain your bike to prevent future mishaps.
Happy riding!
How To Fix It When The Chain Keeps Coming Off The Front Derailleur
Bike chains are an essential component of any bicycle, ensuring that power from your legs is effectively transferred to the wheels. However, dealing with a chain that constantly falls off the front derailleur can be frustrating and even dangerous. But fear not, because in this guide, we will walk you through the steps to fix this common issue.
From adjusting the derailleur to inspecting the chainring, we’ve got you covered with practical solutions that will keep your chain in place. So, hop on your bike and let’s dive into the world of fixing a bike chain that keeps coming off the front derailleur.
Adjusting The Front Derailleur:
- Align the derailleur using the barrel adjuster located near the shifter. This will ensure that the derailleur cage is perfectly positioned to guide the chain onto the chainring.
- Tighten or loosen the high and low limit screws to prevent the chain from falling off towards the frame or the pedals. These screws control the range of movement for the derailleur, preventing the chain from shifting too far inward or outward.
- Use the cable tension adjustment to fine-tune the derailleur. If the chain is consistently falling off, you may need to increase the tension by turning the barrel adjuster clockwise. Conversely, if the chain fails to shift, decrease the tension by turning the barrel adjuster counterclockwise.
Inspecting The Chainring:
- Check for any worn or damaged teeth on the chainring. If you notice any sharp or hooked teeth, it’s time to replace the chainring. Worn teeth can cause the chain to slip or disengage, which leads to frequent chain drops.
- Ensure that the chainring is properly mounted and tightened. Loose or improperly secured chainrings can cause the chain to derail. Double-check the bolts and tighten them, if necessary.
- Clean the chainring thoroughly by removing any dirt or debris lodged between the teeth. A build-up of grime can interfere with the chain’s engagement and cause it to come off the front derailleur.
By following these steps, you can fix a bike chain that keeps falling off the front derailleur and get back to enjoying a smooth and uninterrupted ride. Remember to regularly maintain and inspect your bike’s components to avoid potential issues in the future.
Happy cycling!
More Reasons A Mountain Bike Chain Keeps Falling Off
When it comes to fixing a bike chain that keeps falling off, it can be frustrating and time-consuming. While there can be several reasons for this issue, in this section, we will focus on more of the common explanations. Understanding these reasons can help you identify the problem and take appropriate measures to prevent your mountain bike chain from constantly falling off.
Let’s take a closer look at some of these potential causes:
- ### improper chain tension:
- Chain tension that is either too loose or too tight can often lead to the chain falling off.
- Make sure to adjust the tension of your bike chain correctly to ensure proper engagement with the gears during riding.
- ### worn chain or gears:
- Over time, both chains and gears can wear out and become misshapen, causing the chain to slip off more frequently.
- Regular maintenance, such as cleaning and lubricating your chain, can help prolong its lifespan and reduce the chances of it falling off.
- ### bent or misaligned derailleur:
- A bent or misaligned derailleur can cause the chain to shift improperly and eventually fall off.
- Check your derailleur for any signs of damage or misalignment and make the necessary adjustments or repairs.
- ### incorrect gear shifting technique:
- Shifting gears too abruptly or applying excessive force can put additional strain on the chain, leading to it falling off.
- Ensure that you shift gears smoothly and avoid sudden, jerky movements while riding.
- ### loose or damaged chainring bolts:
- Loose or damaged chainring bolts can cause the chainring to wobble, resulting in chain derailment.
- Regularly check the tightness and condition of the chainring bolts and replace or tighten them as necessary.
- ### poor chainline:
- A misaligned chainline can cause the chain to fall off when shifting gears.
- Check that the chain is properly aligned with the front and rear gears and make any necessary adjustments.
- ### worn or damaged chainring:
- If the chainring is worn or damaged, it may not provide the necessary grip for the chain, leading to frequent derailment.
- Inspect the chainring for any signs of wear or damage and replace it if needed.
- ### inadequate chain lubrication:
- Insufficient lubrication can cause increased friction between the chain and the gears, making it more likely for the chain to fall off.
- Regularly lubricate your chain with a suitable lubricant to minimize friction and ensure smooth operation.
Remember, these are just a few of the possible reasons why your mountain bike chain keeps falling off. It’s essential to regularly inspect and maintain your bike to address any issues promptly. By identifying and addressing the root cause of the problem, you can enjoy a smoother and more reliable riding experience.
How To Check And Fix Excess Lubrication
Bike chains falling off can be a frustrating experience for any cyclist. One common cause of this problem is excess lubrication on the chain. While lubrication is essential for smooth and efficient functioning, an excess can lead to the chain slipping off the gears and derailleurs.
In this section, we will discuss how to check and fix excess lubrication on your bike chain.
Why Is Excess Lubrication A Problem?
Having too much lubrication on your bike chain can attract dirt and debris, forming a sticky residue that affects the chain’s performance. This sticky buildup can cause the chain to slip and fall off the gears, hindering smooth riding and potentially damaging other components of your bike.
To address this issue effectively, follow these steps:
Step 1: Clean The Chain
- Wipe off any visible excess lubrication using a clean rag or cloth.
- Apply a suitable degreaser to the chain and scrub gently with a brush to remove the accumulated grime and residue.
- Rinse the chain thoroughly with water and pat it dry with a clean cloth.
Step 2: Apply The Right Amount Of Lubricant
- Determine the appropriate amount of lubricant for your specific bike chain and riding conditions. Refer to the manufacturer’s instructions or seek advice from a bike shop if needed.
- Apply a small amount of lubricant to the individual chain links, avoiding excess that may lead to accumulation.
- After applying the lubricant, use a clean cloth to wipe off any excess that may have dripped onto the bike frame, gears, or derailleurs.
Step 3: Allow The Lubricant To Settle
- Give the applied lubricant some time to settle into the chain links. This will ensure proper lubrication without creating an excess.
- Before riding your bike, spin the pedals backward a few times to allow the lubricant to distribute evenly.
By following these steps, you can prevent the chain from falling off due to excess lubrication. Remember to regularly clean and lubricate your bike chain as part of your routine maintenance to keep it in optimal condition. Ride confidently knowing that your bike chain will stay securely in place, providing you with a smoother and more enjoyable biking experience.
How To Check For Compatibility
If you’re tired of your bike chain constantly falling off, then you’ve come to the right place. Dealing with a chain that won’t stay in place can be frustrating, but luckily, there are steps you can take to fix the issue.
In this section, we’ll focus on how to check for compatibility, which is a crucial step in ensuring that your bike chain stays put. Let’s dive in and explore the key points you need to know.
Checking Compatibility
To prevent your bike chain from falling off, it’s essential to check for compatibility between your chain and other components of your bike. Here’s what you need to keep in mind:
- Proper sizing: Ensure that your bike chain has the correct length. A chain that is too long or too short can increase the chances of it coming off. Refer to your bike’s owner’s manual or consult a bike specialist to determine the appropriate chain length for your bike.
- Chain and gear compatibility: The chain should be compatible with the gears on your bike, especially the front chainrings and rear cassette or freewheel. Different bike models may require different types of chains, such as those designed for single-speed or multi-speed bikes. Make sure your chain matches the gear system of your bike.
- Worn-out components: Check for worn-out chainrings, cassette, or freewheel. If these components are worn down, it can negatively affect the chain’s performance and increase the likelihood of it falling off. Replace any damaged or worn parts before attempting to fix the chain issue.
- Proper tension: Adjusting the tension of your bike chain is crucial for optimal performance. If the chain is too loose or too tight, it can easily derail. Refer to your bike’s manual or seek professional advice on how to achieve the correct tension for your specific bike model.
By following these compatibility-checking steps, you can greatly reduce the chances of your bike chain falling off and enjoy a smoother, uninterrupted ride.
Remember, maintaining a well-functioning bike chain requires regular care and attention. Stay tuned for the next section, where we’ll discuss some common reasons why a bike chain may fall off and how to troubleshoot those issues. Happy riding!
How To Fix Chain Dropping On Rough Terrains
Cycling on rough terrains can be exhilarating, but it often comes with a challenge: a bike chain that keeps falling off. Dealing with a chain dropping repeatedly can quickly put a damper on your cycling experience. However, there are ways to fix this issue and ensure a smoother ride on rough terrains.
In this section, we will explore some techniques to tackle the problem of chain dropping specifically on rough terrains.
Keep Your Chain Lubricated:
- Use a high-quality bike chain lubricant to ensure smooth movement of the chain.
- Apply the lubricant evenly on the chain, avoiding excess oil that can attract dirt and debris.
Check Chain Tension:
- Make sure your bike’s chain tension is optimal. Too loose or too tight chain tension can contribute to chain dropping.
- Follow the manufacturer’s guidelines or consult a professional for adjusting chain tension correctly.
Inspect Chain And Gears:
- Regularly inspect your chain and gears for signs of wear and tear or damage.
- Replace worn-out components promptly to prevent chain dropping.
Chainring And Rear Derailleur Adjustment:
- Ensure that the chainring teeth and the rear derailleur are properly aligned and positioned.
- Adjust the height and angle of the front derailleur to avoid chain dropping on rough terrains.
Install A Chain Guide Or Chain Retention System:
- Consider installing a chain guide or a chain retention system to prevent the chain from dropping excessively.
- These devices help guide the chain and keep it in place, particularly on bumpy terrains.
Avoid Cross-Chaining:
- Minimize cross-chaining, which means using extreme gear combinations that put excessive strain on the chain.
- Aim to keep your chain running on the middle chainring and an appropriate rear gear.
Adjust Riding Technique:
- Develop a smoother pedaling technique. Avoid sudden or jerky movements that can potentially dislodge the chain.
- Pedal with a consistent rhythm, especially when encountering rough sections of the terrain.
Take Precautions During Descents:
- When riding downhill on rough terrains, be cautious and reduce your speed to minimize the impact on the chain.
- Consider using your brakes wisely, maintaining control of your bike to avoid excessive chain movement.
Clean Your Bike Regularly:
- Keeping your bike clean is vital for a well-functioning chain.
- Regularly remove dirt, mud, and debris that can hinder the chain’s performance and increase the likelihood of chain dropping.
Seek Professional Help:
- If you have tried various techniques but still face issues with chain dropping on rough terrains, it’s best to consult a professional bike mechanic.
- They can assess your bike’s condition, identify any underlying problems, and provide expert solutions.
By following these tips, you can minimize the frustration of a chain dropping on rough terrains and enjoy a more uninterrupted cycling experience. Remember, regular maintenance, proper adjustments, and care can go a long way in keeping your chain where it belongs.
Happy cycling!
How To Fix Bent Chainring Or Chainring Teeth
If you’re an avid cyclist, you know how frustrating it can be when your bike chain keeps falling off. It not only disrupts your ride but also poses a safety hazard. One possible cause of this issue is a bent chainring or damaged chainring teeth.
In this section, we will explore how to fix this problem and get your bike back in top shape.
A bent chainring or damaged chainring teeth can cause the chain to slip off easily. Here are some steps you can take to fix this issue:
- Examine the chainring: Carefully inspect the chainring for any visible signs of damage. Look for bent or misshapen areas, cracked teeth, or excessive wear. If you identify any issues, it’s time to move on to the next step.
- Remove the chainring: To fix a bent chainring, you’ll need to remove it from the bike. Start by loosening the bolts that secure the chainring to the crankset. Once the bolts are loose, carefully take off the chainring from the bike.
- Straighten the chainring: Use an adjustable wrench or a chainring straightening tool to gently bend the bent portions back into shape. Apply gradual pressure and check your progress frequently to avoid over-bending.
- Replace damaged chainring teeth: If any of the chainring teeth are severely damaged or broken, it is best to replace the chainring altogether. Remove the damaged chainring and find a suitable replacement that matches your bike’s specifications.
- Reinstall the chainring: Once you have straightened the chainring or replaced it, it’s time to reinstall it on the bike. Align the chainring properly with the crankset and tighten the bolts securely using a torque wrench.
- Test the chainring: Before taking your bike out for a ride, give the chainring a quick test. Engage the chain and spin the crankset to ensure proper engagement and smooth rotation. If everything looks good, you’re ready to hit the road!
By following these steps, you can fix a bent chainring or damaged chainring teeth and prevent your bike chain from falling off repeatedly. Remember, regular maintenance and inspections are key to keeping your bike in optimal condition. Stay tuned for more tips on how to fix common bike chain problems in the upcoming sections!
Cause 1. Chain Is Too Loose Or Stretched Out
Cause 1: Chain Is Too Loose Or Stretched Out
If you often find yourself dealing with a bike chain that keeps falling off, one possible cause could be that the chain is too loose or stretched out. A loose or stretched chain can easily derail and cause frustration during your ride.
Here are a few key points to keep in mind to fix this issue:
- Ensure proper tension: Check the tension of your bike chain by lifting it off the cassette or chainring. Ideally, there should be a slight amount of slack, allowing the chain to move smoothly. However, it shouldn’t be too loose that it easily falls off.
- Adjust the tension: If your chain feels too loose, you can adjust the tension by using the rear derailleur. Locate the barrel adjuster on the derailleur and turn it clockwise to tighten or counterclockwise to loosen the chain. Make small adjustments and test the chain’s tension after each turn.
- Replace a stretched chain: Over time, chains can stretch out due to wear and tear. If your chain is significantly stretched, it may be best to replace it altogether. Use a chain wear indicator tool to determine the stretching level of your chain. If it exceeds the recommended limit, it’s time to invest in a new one.
- Seek professional help: If you’re unsure about adjusting the chain tension or determining if it’s stretched, don’t hesitate to seek assistance from a professional bike mechanic. They have the expertise to handle such issues and ensure your bike chain is in optimal condition.
By addressing the problem of a loose or stretched chain, you can minimize the chances of it constantly falling off during your rides. Remember to regularly inspect and maintain your chain to prevent this issue from occurring in the first place.
Happy riding!
Cause 2. Chain Is Too Tight Or Too Short
If your bike chain keeps falling off, the second possible cause is that the chain is either too tight or too short. It is essential for a bike chain to have the right amount of tension to function properly. Here are the key points to keep in mind when dealing with a chain that is too tight or too short:
- When a chain is too tight, it can cause excessive stress on the drivetrain components, leading to premature wear and increasing the likelihood of the chain falling off.
- On the other hand, if the chain is too short, it may not engage properly with the chainrings and cogs, resulting in skipping, grinding, and potential chain drop.
To address these issues, follow these steps:
- Check the tension: The chain should have a slight amount of play, allowing it to move up and down when applying pressure. If it feels overly tight, it needs to be loosened.
- Loosen the wheel: If your bike has a rear derailleur, you can adjust the chain tension by loosening the wheel nuts or quick-release lever and moving the wheel slightly forward. This will create some slack in the chain.
- Adjust the chain tension: With the wheel loosened, ensure that there is enough slack to allow smooth operation without excessive movement. Too much slack can lead to chain derailing, while too little can cause unnecessary strain.
- Realign the wheel: Once the tension is adjusted, carefully align the wheel to ensure proper chain alignment. Use the markings on the frame’s dropouts as a guide.
- Test and fine-tune: After making these adjustments, take your bike for a short test ride. Shift through the gears and observe if the chain stays in place. If necessary, make additional tweaks until the chain operates smoothly and remains in position.
By addressing issues related to chain tension, you can prevent your bike chain from falling off due to it being too tight or too short. Remember to periodically check the tension and make any necessary adjustments to ensure optimal performance and a hassle-free riding experience.
Cause 3. Dirty Chain
The third cause of a bike chain constantly falling off is a dirty chain. When your bike chain gets caked with dirt and grime, it can become less efficient and more prone to slipping off the gears. Here are some key points to consider when dealing with a dirty chain:
- Regular cleaning: Make sure to clean your bike chain regularly to remove dirt, debris, and excess grease. Use a degreaser and a chain cleaning tool to thoroughly clean the chain.
- Lubrication: After cleaning the chain, it is important to lubricate it properly. Apply a suitable bike chain lubricant to ensure smooth and efficient operation of the chain.
- Avoid excessive lubrication: While lubricating the chain is important, be careful not to overdo it. Excessive lubrication can attract more dirt and debris, leading to a dirty chain.
- Wipe off excess lubricant: After applying the lubricant, wipe off any excess with a clean rag. This will help prevent dirt from sticking to the chain.
- Check for stiff links: A dirty chain can also lead to stiff links. Inspect the chain closely to identify any links that might be stiff or not moving freely. Use a chain tool or take it to a bike shop to fix the issue.
Remember, a clean and well-lubricated chain is essential for smooth and reliable gear shifting. Regular maintenance and cleaning will not only prevent the chain from falling off but also prolong the life of your bike’s drivetrain.
Cause 4. Chain Imperfections
Cause 4: Chain Imperfections
Sometimes, a bike chain may keep falling off due to chain imperfections. These imperfections can hinder the smooth movement of the chain, causing it to derail frequently. Here are a few key points to consider:
- Worn out chain: A chain that is old or excessively worn can develop stretched links or loose pins, leading to a higher chance of derailment. Regularly inspect your chain and replace it if necessary.
- Misaligned chain: Chains can become misaligned, especially if they have been incorrectly installed or if the bike has experienced an impact or accident. A misaligned chain can easily slip off the gears.
- Dirty or rusted chain: A dirty or rusted chain can increase friction and cause the chain to bind or skip, resulting in it falling off the sprockets. Regularly clean and lubricate your chain to prevent this issue.
- Incorrect chain tension: Improper chain tension can also contribute to frequent derailing. A chain that is too loose or too tight can easily come off the gears while riding. Ensure your chain has the correct tension according to your bike’s manufacturer specifications.
By addressing these chain imperfections, you can significantly reduce the chances of your bike chain falling off during your rides. Regular maintenance and inspection will help keep your chain in optimal condition, allowing for smooth and trouble-free cycling adventures. Remember, a well-maintained chain ensures a safer and more enjoyable biking experience.
Cause 5. Worn-Out Chain
Are you tired of constantly dealing with a bike chain that keeps falling off? Don’t worry, we’ve got you covered! In this blog post, we’ll dive into one of the most common causes of a chain falling off – a worn-out chain.
Understanding the signs and symptoms of a worn-out chain is crucial in preventing further issues and maintaining a smooth ride. So let’s get started and learn how to fix this problem once and for all!
Cause 5: Worn-Out Chain
A worn-out chain can become a major headache for any cyclist. Over time, constant pedaling puts strain on the chain and its components, causing it to stretch and wear down. Here are a few key points to keep in mind when dealing with a worn-out chain:
- Signs of wear: Look out for signs such as excessive chain “stretch” or elongation, visible rust, or worn-out teeth on the chainrings and cassette.
- Chain length: Measure the length of your chain regularly to ensure it falls within the recommended specifications. A chain that has stretched beyond its limit can easily derail and fall off.
- Maintenance: Regular chain maintenance is essential to prevent excessive wear. Keep your chain clean, lubricated, and properly tensioned to prolong its lifespan.
- When to replace: It’s crucial to replace a worn-out chain before it leads to further damage. Using a chain checker tool can help determine when it’s time for a replacement.
- Installation: When installing a new chain, make sure to follow the manufacturer’s instructions and use the correct technique. Proper installation will help maintain optimal performance and prevent future issues.
By addressing a worn-out chain promptly, you can save yourself from constant frustrations and enjoy a smoother biking experience. Remember, maintaining your bike chain is essential for both your safety and the longevity of your components. So keep an eye on your chain’s condition and don’t hesitate to take action when needed.
Happy Riding!
Stage Should To Be Follow:
Bikes are a convenient mode of transportation, but sometimes, even the most reliable bikes can face issues. One common problem is a bike chain that keeps falling off. It can be frustrating and inconvenient, but fear not! With a few simple steps, you can fix a bike chain that keeps falling off and get back to enjoying your ride.
Assess The Chain Tension
- Check if the bike chain is too loose or too tight.
- If it’s loose, you’ll need to tighten it to prevent it from falling off.
- If it’s too tight, it can put excessive pressure on the chain and cause it to come off.
Inspect The Chainring And Rear Derailleur
- Look for any signs of damage or misalignment on the chainring and rear derailleur.
- Misalignment can cause the chain to derail and fall off.
- If you notice any issues, it might be necessary to adjust or replace these components.
Examine The Chain And Cassette
- A worn-out chain can easily slip or fall off the gears.
- Inspect the chain for any signs of wear or stretch.
- If the chain is worn out, it’s advisable to replace it.
- Additionally, a worn cassette can also contribute to chain slipping.
- Check the cassette for any signs of wear and replace it if necessary.
Lubricate The Chain
- Insufficient lubrication can cause the chain to become stiff and prone to falling off.
- Apply a suitable bicycle chain lubricant to ensure smooth movement.
- Be sure to wipe off any excess lubricant to prevent attracting dirt and debris.
Realign The Derailleur
- Sometimes, a misaligned derailleur can cause chain issues.
- Use the barrel adjuster to fine-tune the derailleur’s position.
- Ensure proper alignment so that the chain can smoothly engage with the gears.
Check The Chain Tensioner
- If your bike has a tensioner, make sure it is holding the chain taut.
- Inspect the tensioner for any damage or wear.
- Replace if necessary to maintain correct chain tension.
By following these steps, you can fix a bike chain that keeps falling off and enjoy an uninterrupted, smooth ride. Remember, regular maintenance and periodic inspections are crucial to prevent such issues from occurring. Keep your bike in great condition, and you’ll have many enjoyable rides ahead.
Stage 1. Position The Bike Correctly
Before attempting to fix a bike chain that keeps falling off, it’s essential to position the bike correctly. This ensures that you have easy access to the chain without straining your body. Here are the key points to consider:
- Find a flat and stable surface: Place your bike on a level surface to prevent it from toppling over during the repair process.
- Use a bike stand or flip the bike upside down: Utilizing a bike stand is the ideal method as it keeps the bike upright, making it easier to work on. However, if you don’t have a stand, flipping the bike over is an alternative solution.
- Adjust the working height: Make sure the bike is at a comfortable working height, allowing you to easily examine the chain and perform necessary adjustments or repairs.
Positioning the bike correctly is the first step towards fixing a bike chain that keeps falling off. Now that you have set up your bike, let’s proceed to the next stage where we’ll inspect and identify any potential issues with the chain.
Stay tuned!
Stage 2. Locate The Derailleur Screw
If you’ve noticed that your bike chain keeps falling off, the derailleur screw might be the culprit. The derailleur screw is a small but important component that helps to maintain tension and keep your chain in place. In this stage, we will guide you through locating the derailleur screw and understanding its role in fixing your bike chain issues.
Here are the key points to keep in mind:
- Locating the derailleur screw: The derailleur screw is typically found on the rear derailleur of your bike. Look for a small, round screw that is often marked with a “+” or “-“. It is usually located close to where the derailleur attaches to the derailleur hanger.
- Understanding its role: The derailleur screw is responsible for adjusting the tension in the derailleur, which in turn affects the placement of the bike chain. By making adjustments to the derailleur screw, you can fine-tune the position of the derailleur and help prevent the chain from falling off.
- Making adjustments: To fix a bike chain that keeps falling off, you may need to turn the derailleur screw using a screwdriver. Turning it clockwise will increase tension and move the derailleur outwards, while turning it counterclockwise will decrease tension and move the derailleur inwards. Experiment with small adjustments until you find the right balance to keep your chain secure.
- Seek professional help if needed: If you are unsure about making adjustments to the derailleur screw or if you are unable to fix the issue, it is advisable to seek help from a professional bike mechanic. They have the expertise to diagnose and resolve any complex chain-related problems.
Remember, locating the derailleur screw is just one step in the process of fixing a bike chain that keeps falling off. It is essential to follow the next stages in this guide to ensure a comprehensive solution to your bike chain issues.
Stage 3. Increase The Tension Of The Chain
When your bike chain keeps falling off, it could be due to insufficient tension. The tension of the chain plays a crucial role in keeping it securely in place and preventing any mishaps during your ride. In this stage, we will explore how to increase the tension of the chain effectively.
By following these steps, you can get your bike chain back on track and enjoy a smooth and safe cycling experience.
Adjusting The Rear Derailleur
- Position the bike on a repair stand or flip it upside down, ensuring stability for easy access to the drivetrain.
- Locate the rear derailleur, which is responsible for guiding the chain onto the corresponding gears.
- Look for the barrel adjuster, usually situated where the derailleur cable enters the rear derailleur body.
- Turn the barrel adjuster clockwise to tighten the tension of the chain. Make small adjustments and test the chain’s tension after each turn. Remember that over-tightening can lead to poor shifting performance.
Adding Tension Via The Chain Tensioner
- Some bikes feature a chain tensioner, which can be used to increase the tension without adjusting the derailleur.
- Identify the chain tensioner, which is typically positioned near the rear wheel and above the chainstay.
- Use a wrench or an appropriate tool to turn the tensioner’s adjustment screws clockwise, gradually increasing the tension of the chain. Again, it’s important to make small adjustments and test the chain’s tension frequently.
Checking The Chain Length
- A chain that is too long can lead to excessive slack, causing it to fall off frequently. Assess the chain length to ensure it is within the proper range.
- Shift the chain onto the largest chainring and the smallest rear cog.
- While in this position, the chain should have a slight amount of tension but not appear overly taut.
- If the chain is too long, follow the manufacturer’s instructions to remove the excess links until the desired tension is achieved.
Maintaining Proper Chain Tension
- Regularly check and adjust the chain tension to prevent it from becoming loose or excessively tight.
- Aim for a tension that allows smooth shifting and prevents the chain from derailing.
- Avoid riding with a loose chain as it poses a safety risk and can lead to damage to the drivetrain components.
- Consult your bike’s user manual or seek assistance from a professional bike mechanic if you are unsure about the appropriate chain tension.
Increasing the tension of your bike chain is an essential step in fixing the issue of it falling off. By following these methods, you can ensure that your chain stays in place during your rides, providing you with a hassle-free cycling experience.
So, let’s get your chain tension right and enjoy a smoother and more secure ride!
Stage 4. Test The Chain And Rear Wheel
Now that you’ve successfully reattached your bike chain, it’s important to test it and ensure that it doesn’t fall off again. This stage is crucial to ensure a smooth and safe ride. Here are the key points to keep in mind:
- ### check for proper tension:
- Carefully lift the rear wheel of your bike off the ground.
- Spin the pedals forward and observe the chain’s movement.
- The chain should run smoothly and stay on the chainring and rear sprockets without slipping or falling off.
- If you notice any looseness or excessive slack in the chain, it needs to be adjusted.
- ### inspect the rear wheel alignment:
- Stand behind your bike and look closely at the rear wheel.
- Ensure that it sits straight and centered within the bike frame.
- If the wheel appears misaligned, it can lead to chain misalignment and cause it to fall off repeatedly.
- Adjust the wheel alignment if necessary by loosening the axle nuts or quick-release skewer and repositioning the wheel.
- ### test the gear shifting:
- Shift through your bike’s gears while pedaling.
- Pay attention to how the chain smoothly moves between different gears.
- If you experience any hesitation, grinding noises, or difficulty shifting, it may indicate an issue with the chainrings, derailleur, or gear cables.
- Address any gear shifting problems promptly to prevent chain derailment.
- ### ride a short distance:
- Take your bike for a short test ride, preferably on a smooth and flat surface.
- Pedal steadily and observe the chain’s behavior.
- If the chain remains securely on the chainring and rear sprockets without any signs of slipping or falling off, congratulations! You’ve successfully fixed the issue.
- However, if the chain still falls off, it may require further adjustment or repair.
Remember, proper chain tension, rear wheel alignment, and smooth gear shifting are the keys to a well-functioning bike chain. By thoroughly testing the chain and rear wheel, you can ensure a safe and enjoyable ride on your bicycle.
Stage 5. Fit Everything Back Into Place
Now that you have carefully cleaned and lubricated your bike chain, it’s time to put everything back together and ensure that the chain stays in place. Follow these steps to properly fit everything back into place:
- Check that the derailleur is properly aligned and functioning correctly.
- Slowly place the chain onto the front chainring and ensure that it fits snugly onto the teeth.
- Carefully guide the chain onto the rear cassette, making sure that it engages with the smallest gear.
- Begin pedaling slowly to allow the chain to shift smoothly onto the larger gears.
- Test the shifting by cycling through the gears to ensure that the chain stays securely in place.
- Confirm that the derailleur is properly adjusted to prevent the chain from falling off during gear changes.
Remember, it’s important to take your time and be gentle when fitting the chain back into place. Rushing or using excessive force can lead to misalignment, which may cause the chain to fall off again. Happy cycling!
Stage 1. Check For The Length And Tightness
Stage 1: Check For The Length And Tightness
Before attempting to fix a bike chain that keeps falling off, it’s important to start with stage 1: checking for the length and tightness of the chain. This initial step will help identify any issues that may be causing the chain to constantly come loose.
Here are the key points to consider:
- Chain length: Ensure that the chain is the appropriate length for your specific bike. A chain that is too long or too short can cause it to fall off easily. Use a chain checker tool or consult your bike’s manual to determine the correct chain length.
- Chain tension: Check the tightness of your bike chain. It should have just enough tension to prevent it from sagging but not so tight that it causes excessive stress on the drivetrain components. Ideally, the chain should be able to move up and down slightly when pulled.
- Chain alignment: Examine the alignment of the chain by focusing on how it runs through the gears and pulleys. A misaligned chain can easily derail, leading to it constantly falling off. Use your eyes or a visual guide to ensure that the chain is running smoothly and straight.
- Chain lubrication: Adequate chain lubrication is crucial for smooth operation and reduced friction. If your chain is dry or dirty, it can contribute to frequent chain derailments. Apply a suitable bicycle chain lubricant to ensure that the chain moves freely.
Remember that stage 1 involves checking and assessing the length, tightness, alignment, and lubrication of your bike chain. By performing these simple checks, you can pinpoint the cause of the chain falling off and lay the foundation for a successful repair.
Once you’ve completed stage 1, you can move on to the subsequent stages to troubleshoot and fix any remaining issues causing the chain to keep falling off.
Stage 2. Check For Any Damage
After successfully reattaching the bike chain in stage 1, it’s important to thoroughly inspect the chain for any signs of damage. This will help ensure that the chain stays in place and doesn’t fall off again. Here are some key points to keep in mind during the inspection:
- Examine the links: Check each link of the chain for any bends, twists, or signs of wear. Look out for loose or stiff links as well. Damaged links can cause the chain to derail, so it’s crucial to address any issues.
- Check the chain for rust: If there’s rust on the chain, it can affect its performance and cause it to fall off. Clean the chain with a degreaser and a brush, and then lubricate it properly to prevent future rusting.
- Inspect the chainring and cassette: Look closely at the chainring and the cassette to ensure they are in good condition. A worn-out chainring or cassette can cause the chain to come off. If you notice any excessive wear or teeth that are too worn down, it may be time to replace them.
- Verify the derailleur alignment: The derailleur plays a crucial role in keeping the chain on track. Make sure it is properly aligned and that it moves smoothly without any hitches. Adjustments may be necessary if there are any misalignments.
- Check the chain tension: A chain that is too loose or too tight can cause issues with chain retention. Use a chain tension tool or follow the manufacturer’s guidelines to ensure the chain has the correct tension.
Remember to address any damage or issues you identify during the inspection promptly. By fixing these problems, you’ll help prevent the chain from falling off again in the future. So, let’s move on to stage 3 and learn how to properly maintain your bike chain.
Stage 3. Loosen The Chain If Too Tight
Stage 3: Loosen The Chain If Too Tight
After adjusting the tension of your bike chain, you might find that it’s still too tight, causing it to fall off frequently. Don’t worry, there’s a simple solution for this issue. By loosening the chain, you’ll ensure that it has enough slack to move smoothly without coming off the gears.
Here are the key points to keep in mind when loosening a tight bike chain:
- Start by locating the rear axle nut or quick-release lever on the bike’s rear wheel. This is where you’ll make the necessary adjustments to loosen the chain.
- Loosen the rear axle nut or release the lever slightly, allowing the wheel to move forward. This action creates more slack in the chain.
- Gently push the rear wheel forward to introduce the desired amount of slack in the chain. Keep in mind that you don’t want the chain to be too loose, as it can lead to poor shifting or slipping off the gears.
- Once you’ve achieved the appropriate amount of slack, tighten the rear axle nut or secure the quick-release lever, ensuring that the wheel remains in place.
By following these steps, you’ll successfully loosen a tight bike chain, reducing the likelihood of it falling off during your rides. Remember to periodically check the chain tension to ensure it remains adjusted properly and provide a smooth and safe cycling experience.
Happy riding!
Stage 4. Expose The Chain
Now that you’ve successfully removed the bike chain from the derailleur, it’s time to expose the chain fully. This stage is crucial for identifying any underlying issues causing the chain to keep falling off. By uncovering the chain, you can assess its condition and determine the appropriate course of action.
Here is what you need to do at this stage:
- Inspect the chain for damage: Take a close look at the entire length of the chain, examining each link for signs of wear, rust, or any other damages. If you notice any particular areas that seem problematic, make a mental note or mark them with a small piece of tape.
- Check the tension: The tension of the chain plays a vital role in its stability. Ensure that the chain is not too loose or too tight. Ideally, it should have a slight amount of slack, allowing it to move freely without sagging excessively.
- Look for misalignment: A misaligned chain can lead to frequent derailments. Check if the chain is aligned properly with the chainrings and the cassette. A misaligned chain may appear to be angled or skewed when viewed from behind the bike.
- Clean the chain: A dirty or grimy chain can hinder its smooth operation and increase the likelihood of it falling off. Use a degreaser and a brush to clean the chain thoroughly. This will also help you remove any debris that might be causing the chain to jam or skip.
- Grease the chain: Once the chain is clean and dry, apply an appropriate lubricant to ensure smooth movement. Be careful not to over-lubricate, as excess grease can attract dirt and grime, leading to further issues.
Taking the time to expose the bike chain allows you to assess its condition and address any issues that may be causing it to keep falling off. By inspecting, cleaning, and greasing the chain, you can enhance its performance and prevent future derailments.
Stage 5. Disconnect The Chain
Now that you’ve identified the issues leading to your bike chain falling off, it’s time to take action and fix the problem. Disconnecting the chain is the next step in the process. Here’s what you need to do:
- Begin by finding the quick link on your bike chain. This is a special link that allows for easy removal and reinstallation of the chain.
- Use a pair of needle-nose pliers to squeeze the sides of the quick link together. This will release the tension and allow you to remove the chain from the bike.
- Once you’ve disconnected the chain, take a moment to inspect it for any signs of damage or wear. Look for bent links or any other issues that may have contributed to the chain falling off.
- If you notice any damage, it may be necessary to replace the chain entirely. However, if the chain appears to be in good condition, you can proceed with cleaning and reinstalling it.
Remember, proper maintenance is key to preventing your bike chain from falling off in the future. Regularly cleaning and lubricating the chain, as well as keeping an eye on its condition, will help ensure smooth and reliable performance. With this stage complete, you’re one step closer to fixing your bike chain and getting back on the road.
Stage 6. Check For The Proper Length And Add Extra Links
Stage 6. Check for the proper length and add extra links
When it comes to fixing a bike chain that keeps falling off, ensuring the proper length of the chain is crucial. This stage involves checking the length of the chain and adding extra links if necessary. Here are the key points to keep in mind:
- Check the current length of the bike chain by pulling it tight to see if it reaches from the front chainring to the rear derailleur. If the chain is too short, it can cause the chain to fall off frequently.
- To add extra links to the chain, you will need a chain tool, which can be purchased from a bike shop or online. This tool helps you remove and add links to adjust the chain length.
- Start by removing the broken or damaged link using the chain tool. Simply line up the tool with the pin holding the link together and turn the handle until the pin pushes out.
- Once the damaged link is removed, you can add the necessary number of extra links to make the chain longer. These extra links are usually available as separate chain links or can be taken from a spare chain.
- Connect the extra links to the chain by aligning the holes of the links and using the chain tool to push the pin back in. Make sure the link is securely connected, but not too tight.
- After adding the extra links, reattach the chain to the bike by threading it through the front chainring and the rear derailleur. Use the chain tool to secure the chain by pushing the pin back in place on the appropriate link.
- Ensure the chain moves smoothly and freely without any tight spots or excessive slack. If needed, you can make minor adjustments to the length by removing or adding links.
- Finally, do a test ride to see if the chain stays in place and doesn’t fall off anymore. If the problem persists, it may be related to other issues with the bike, such as the derailleur or chainring alignment, which might require professional attention.
By following these steps and checking for the proper length of the chain, you can minimize the chances of your bike chain falling off during rides. Remember to always carry a chain tool and spare links when on long rides for quick repairs if needed.
Keep your bike in good condition, and you’ll enjoy smoother and more trouble-free rides.
Stage 7. Re-Install And Test The Chain
After successfully removing and cleaning the bike chain, it’s time to re-install it and ensure that it stays put. This stage is crucial to get your bike back in working order and prevent any future chain slippage. Follow the steps below to re-install and test the chain:
- Align the chain: Make sure the chain is properly aligned on the chainring at the front and the cassette at the back. It should sit on the teeth of both without any twists or kinks.
- Thread the chain through: Begin by feeding the chain through the rear derailleur and around the chainring at the front. Ensure it is properly seated on the teeth of both components.
- Close the quick link: If your chain has a quick link, use the pliers to snap it back into place. Make sure it is securely closed to prevent any issues. If your chain doesn’t have a quick link, follow the specific instructions for your chain type to connect it properly.
- Check tension: Gently pull the chain towards the rear wheel to check its tension. It should have a slight amount of slack and be able to move up and down by about half an inch.
- Test the gears: Shift through all the gears to ensure the chain moves smoothly and doesn’t skip or fall off. If you notice any issues, carefully adjust the rear derailleur to fine-tune the shifting.
- Check for proper alignment: While pedaling the bike, observe if the chain stays aligned and doesn’t rub against the front derailleur or rear derailleur cage. If needed, make additional adjustments to ensure proper alignment.
- Test ride: Take your bike for a test ride in a safe area to ensure the chain stays on and the gears shift smoothly. Pay attention to any unusual noises or signs of chain slippage during the ride.
By following these steps, you can re-install your bike chain correctly and test it to ensure it stays in place. Remember, a properly functioning chain is vital for a smooth and safe biking experience.
Stage 1. Get The Tools You Need
Stage 1. Get The Tools You Need.
Before you dive into fixing a bike chain that keeps falling off, it’s essential to gather all the necessary tools. Having the right tools on hand will make the process much easier and efficient. Here are the tools you’ll need:
- Chain breaker tool: A chain breaker tool is a must-have for fixing a bike chain. It allows you to remove and reattach chain links easily.
- Chain lubricant: Proper lubrication is crucial for the smooth operation of your bike chain. Make sure you have a high-quality chain lubricant on hand to keep your chain running smoothly.
- Pliers: Pliers will come in handy when dealing with stubborn or hard-to-reach chain links. They provide extra grip and leverage to help you loosen or tighten the chain.
- Allen wrenches: Most bike chains are held together with allen bolts. Having a set of allen wrenches in various sizes will ensure you can properly adjust and secure your bike chain.
- Rag or cloth: It’s always a good idea to have a rag or cloth nearby to wipe away any grease or dirt that may get on your hands or the bike chain during the repair process.
Now that you have all the necessary tools, you’re ready to move on to the next stage of fixing your bike chain that keeps falling off.
Stage 2. Apply Degreaser And Scrub The Chain
After successfully removing the bike chain, it’s time to give it a thorough clean. In this stage, we will be applying degreaser and scrubbing the chain to remove any dirt, grime, and built-up oil. This is an important step in ensuring that your bike chain functions smoothly and doesn’t keep falling off.
Follow the steps below to effectively clean your bike chain:
- Apply a degreaser: Start by applying a suitable degreaser to the chain. This will help break down any accumulated grease or debris. Make sure to use a degreaser specifically designed for bike chains, as other cleaners may damage the chain.
- Let it sit: Allow the degreaser to penetrate the chain for a few minutes. This will help loosen any stubborn dirt or grease, making it easier to remove.
- Scrub the chain: Using a chain cleaning brush or an old toothbrush, start scrubbing the chain. Focus on each link, making sure to thoroughly clean all sides of the chain. Apply gentle pressure and use a back-and-forth motion to dislodge any stubborn grime.
- Rinse with water: Once you have scrubbed the entire chain, rinse it thoroughly with clean water. This will remove any remaining degreaser and dirt from the chain.
- Dry the chain: After rinsing, use a clean cloth or towel to dry the chain. Make sure to remove any excess moisture to prevent rusting.
- Lubricate the chain: Finally, apply a suitable bike chain lubricant to ensure smooth operation. This will help reduce friction and keep the chain running smoothly.
Remember, keeping your bike chain clean and well-maintained is essential for optimal performance. Regular cleaning and lubrication will not only prevent the chain from falling off but also extend its lifespan. So, take the time to clean your bike chain properly, and you’ll be rewarded with a smoother and more enjoyable ride.
Stage 3. Wash It With Detergent And Water
Keeping your bike chain clean is essential for its proper functioning and durability. Over time, dirt, grease, and debris can accumulate on the chain, causing it to fall off frequently. In stage 3 of fixing a bike chain that keeps falling off, we will discuss how to wash it with detergent and water.
Following these steps will help ensure a smooth and secure ride:
- Begin by gathering the necessary materials:
- Mild detergent or bike-specific chain cleaner
- Bucket of water
- Soft-bristled brush or toothbrush
- Clean rag or towel
To thoroughly clean your bike chain, follow these steps:
- Dip the brush or toothbrush into the soapy water or chain cleaner. Ensure the bristles are well saturated but not dripping.
- Gently scrub the chain, paying attention to each link. Use a back-and-forth motion to dislodge any dirt or grime.
- Continue brushing until the chain appears clean and free from debris.
- Rinse the chain with clean water to remove any lingering detergent or cleaner. Ensure that all soap residue is gone.
- Carefully dry the chain with a clean rag or towel, making sure it is completely dry before moving on to the next stage.
Remember to go the extra mile and dry the chain thoroughly to prevent rusting.
By effectively washing your bike chain with detergent and water, you remove dirt and grime that can lead to chain derailment. This simple step will enhance the performance and lifespan of your bike chain. With a clean and well-lubricated chain, you can enjoy a smooth ride free from the frustration of constant chain falls.
Ready to move on to the next stage? Let’s continue fixing our bike chain that keeps falling off.
Stage 4. Dry And Lubricate The Chain
Riding your bike can be an exhilarating experience, but it can quickly turn frustrating when the chain keeps falling off. Luckily, this is a common problem and with a few simple steps, you can easily fix it yourself. In this stage, we will focus on dry and lubricating the chain, as it plays a crucial role in keeping the chain in place and running smoothly.
Stage 4: Dry And Lubricate The Chain
Properly maintaining your bike chain is essential for a smooth ride. Here’s what you need to do:
- Clean the chain: Before applying any lubricant, it’s important to clean the chain properly. Use a degreaser and a brush to remove any dirt, grime, or old lubricant that may have built up. Ensure that the chain is completely dry before moving on to the next step.
- Choose the right lubricant: There are different types of lubricants available, such as wet, dry, and wax-based lubricants. The type of lubricant you choose depends on the weather conditions you typically ride in. Dry lubricants work well in dry conditions as they don’t attract dirt, while wet lubricants offer better protection in wet or damp conditions. Apply a small amount of lubricant to each link of the chain, ensuring it is evenly distributed.
- Let it soak in: After applying the lubricant, give it a few minutes to work its way into the chain. This will help the lubricant penetrate the moving parts and reduce friction. Wipe off any excess lubricant using a clean cloth to prevent attracting dirt and debris.
- Check the tension: While the chain is still lubricated, check the tension by gently pushing on it. It should have a bit of give but not be too loose. If it’s too loose, you may need to adjust the tension using the rear derailleur or by adding/removing links. Consult your bike’s manual for specific instructions on how to do this.
- Recheck regularly: Keep an eye on your chain’s condition and reapply lubricant as needed. Riding in dusty or wet conditions may require more frequent lubrication. It’s also a good idea to periodically clean your chain to remove any dirt or debris that may have accumulated.
By following these steps and properly maintaining your bike chain, you can ensure smooth and hassle-free rides. Remember, a well-lubricated chain not only keeps the chain from falling off but also prolongs its lifespan. Happy riding!
Stage 1. Lubricate The Chain
Lubricating your bike chain is an essential step in keeping it running smoothly and preventing it from falling off. By applying the right lubricant, you can reduce friction, protect against rust, and extend the lifespan of your chain. Here are the key points to remember when lubricating your bike chain:
- Choose the right lubricant: There are various types of chain lubricants available in the market, including wet, dry, and wax-based options. Consider the conditions you’ll be riding in and select a lubricant that suits your needs.
- Prepare your bike: Before applying lubricant, make sure your chain is clean and free from dirt and debris. You can use a degreaser and a brush to remove any gunk on the chain.
- Apply the lubricant: Place a small drop of lubricant on each roller of the chain, ensuring even coverage. Avoid over-applying, as excess lubricant can attract dirt and cause more harm than good.
- Let it soak in: After applying the lubricant, give it some time to penetrate the chain. This allows the lubricant to do its job effectively and provide optimal protection.
- Wipe off excess lubricant: Once the lubricant has had time to settle, gently wipe off any excess with a clean rag. This prevents the accumulation of dirt and keeps your drivetrain running smoothly.
Remember, a well-lubricated chain not only reduces the chances of it falling off but also improves your bike’s overall performance. Regular maintenance and lubrication will keep you pedaling smoothly and enjoying your rides to the fullest.
Stage 2. Use A Chain Tool
Once you’ve identified the cause of your bike chain falling off, it’s time to move on to the next stage of fixing it: using a chain tool. This essential tool will help you make the necessary adjustments to ensure your chain stays securely in place.
Here are the key points to keep in mind when using a chain tool:
- Start by locating the damaged link in your chain. It may be bent, twisted, or misaligned, causing the chain to fall off repeatedly.
- Position the chain tool over the damaged link, lining up the chain pin with the tool’s pin.
- Slowly turn the handle of the chain tool clockwise to push the chain pin out of the link. Ensure you apply steady and even pressure to avoid damaging the chain.
- Once the chain pin is partially pushed out, stop turning the tool and remove it from the chain.
- Gently wiggle the chain from side to side to free the damaged link from the rest of the chain.
- Inspect the damaged link for any obvious issues, such as burrs or twists. If possible, straighten or smooth out these imperfections using pliers or a file.
- Align the cleaned and repaired link with the rest of the chain, ensuring all the roller pins are in their proper position.
- Reinsert the chain pin into the link by positioning the chain tool over it and turning the handle counterclockwise. This will push the pin back into place.
- Use the chain tool to fully secure the chain pin by applying continuous and even pressure until the pin is flush with the surrounding links.
- Finally, give the chain a visual inspection to ensure it moves smoothly and without any obvious signs of damage. Spin the pedals backward to confirm that the chain no longer falls off.
By using a chain tool properly, you can address the specific issues causing your bike chain to fall off and restore its functionality. With your chain securely in place, you’ll be ready to hit the road or trail once again without the frustration of a constantly derailing chain.
Stage 3. Fold The Link
Bike chains can be a tricky business. Just when you think you’ve fixed the problem, that stubborn chain decides to take another plunge off its rightful place. But fear not, we’ve got you covered. In this stage of fixing a bike chain that keeps falling off, we’ll discuss the important process of folding the link.
So roll up your sleeves and let’s dive in!
When it comes to fixing a bike chain, folding the link properly is crucial. Here are the key points to remember:
- Align the chain: Ensure that the ends of the broken chain link are lined up correctly.
- Position the chain tool: Place the chain tool’s pin against the chain rivet that you want to insert.
- Fold the link: Use the chain tool to push the pin through the outer link, connecting it with the inner link.
- Test the connection: Once the link is folded, give the chain a gentle tug to make sure it’s securely joined.
Remember, proper folding of the link is essential to ensure a secure and reliable chain. By following these steps, you’ll be back on the road in no time!
So, there you have it! The third stage of fixing a bike chain that keeps falling off is all about folding the link. By aligning the chain correctly, positioning the chain tool, folding the link, and testing the connection, you’ll be well on your way to a smooth ride.
Stay tuned for the next stage where we’ll delve into further troubleshooting tips to keep your chain in place. Happy cycling!
Stage 4. Shorten The Chain
Now that you have checked and adjusted the chain tension, it’s time to move on to stage 4: shortening the chain. Shortening the chain is a crucial step in fixing a bike chain that keeps falling off, as it helps to ensure proper alignment and prevent derailments.
Here are the key points to keep in mind:
- Measure the chain: Start by measuring the chain to determine how many links need to be removed. You can use a chain tool or a ruler to measure the chain accurately.
- Remove the excess links: Using a chain tool, carefully push out the pins to remove the excess links. Make sure to follow the manufacturer’s instructions for your specific chain type.
- Reattach the chain: Once you have removed the necessary links, reattach the chain by inserting the pins back into the chain using the chain tool. Ensure that the pins are properly aligned and fully inserted.
- Test the chain: After shortening the chain, it’s important to test it by shifting through the gears and pedaling. Make sure the chain moves smoothly without any skipping or slipping.
- Recheck chain tension: Once you have shortened the chain, go back and recheck the chain tension. It may need further adjustment now that the length has been changed.
Shortening the chain is an essential step in fixing a bike chain that keeps falling off, as it helps improve the overall stability and functionality of the drivetrain. By following these steps, you can ensure a secure and reliable bike chain that stays in place during your rides.
Stage 1. Check The Chain Health
Before diving into fixing a bike chain that keeps falling off, it’s crucial to assess the health of the chain. This will help determine whether the issue lies with the chain itself or if there are other factors contributing to the problem.
Here are some key points to consider:
- Visual inspection: Take a close look at the chain to identify any visible signs of damage or wear. Look for rust, stretched links, or twisted plates.
- Chain tension: Check the tension of the chain by pulling it away from the gears. A properly tensioned chain should have a bit of give but shouldn’t be too loose.
- Chain lubrication: Assess the lubrication of the chain. A dry or sticky chain can contribute to it falling off. Ensure that the chain is lubricated adequately.
- Sprocket condition: Examine the sprockets to ensure they are in good condition. Worn-out teeth or bent sprockets can cause the chain to derail.
- Chain cleanliness: Dirt and debris can accumulate on the chain, affecting its performance. Clean the chain thoroughly using a suitable bike chain cleaner.
By checking these aspects, you’ll have a clearer understanding of the chain’s health and whether it needs to be replaced or repaired. In the next stage, we’ll delve into fixing common chain issues that might be causing it to fall off frequently.
Stay tuned!
Remember, a well-maintained chain is key to a smooth and enjoyable biking experience. So, let’s get started on fixing that pesky chain!
Stage 2. Check The Number Of Rear Gears
Before diving into complex bike chain issues, sometimes the solution could be as simple as adjusting the number of rear gears. This is an important step to take if your bike chain keeps falling off. Let’s explore how to check the number of rear gears and ensure that your chain stays securely in place.
First, let’s look at how to check the number of rear gears:
- Take a closer look at your bike: Examine the rear section of your bike, where the gears are located. Look for the gear cluster or cassette.
- Count the gears: Check how many cogs or gears are present on the rear wheel cluster. Count them accurately to determine the number of rear gears your bike has.
- Refer to your bike’s specifications: Consult your bike’s manual or manufacturer’s website to find the exact number of gears your bike should have. This information will give you a baseline to work from.
- Inspect the gear shifting mechanism: If your bike has a derailleur, make sure it is properly aligned and in good condition. A misaligned or damaged derailleur can cause the chain to fall off more frequently.
By following these steps, you’ll gain a better understanding of your bike’s rear gears and be one step closer to fixing the issue. Once you ascertain the correct number of gears, you can proceed to the next stage of the troubleshooting process.
Stage 3. Remove The Old Chain
Biking can be a fun and exhilarating way to stay active and enjoy the great outdoors. But what happens when your bike chain keeps falling off? It can be frustrating and even dangerous if you’re in the middle of a ride.
Fear not, because i’m here to guide you through the process of fixing a bike chain that just won’t stay put. In this blog post, we’ll dive into stage 3: removing the old chain. So let’s get started!
Removing The Old Chain:
- Start by grabbing a chain tool, which is a handy tool specifically designed for removing and installing bike chains. It’s a small, compact tool that you can easily carry with you on your rides.
- Position your bike so that the chain is easily accessible. If necessary, flip your bike over or prop it up on a bike stand. This will make it easier for you to work on the chain without straining your back or neck.
- Locate the quick link or master link, which is a special type of link that allows you to easily remove and reinstall your bike chain. It usually looks slightly different from the other links in the chain and can be identified by its appearance or by referring to your bike’s manual.
- Using your chain tool, carefully position the tool’s pin against the rivet of the quick link or master link. Slowly and steadily turn the handle of the chain tool, pushing the pin against the rivet until it starts to move. Keep applying pressure until the rivet pops out and the link separates.
- Once the quick link or master link is removed, gently pull the chain apart to completely separate it from your bike. Be careful not to let it snap back and cause injury.
- Take a moment to inspect the old chain for any signs of damage or wear. Look for bent or broken links, excessive rust, or stretched sections. If the old chain is in poor condition, it’s best to replace it with a new one rather than trying to fix it.
Now that you’ve successfully removed the old chain, you’re ready to move on to the next stage of fixing your bike chain. Stay tuned for stage 4, where we’ll tackle the installation of a new chain. Keep reading to get your bike back on track in no time!
Stage 4. Determine The New Chain Length
Before you can fix a bike chain that keeps falling off, you need to determine the correct chain length. Ensuring that your chain is properly sized will help maintain the overall functionality of your bike. Follow these steps to determine the new chain length:
- Prepare the bike: Place your bike on a stand or prop it up securely, ensuring that it won’t shift or topple over while you work.
- Shift to the smallest chainring and rear cog: Move the chain onto the smallest front chainring and the smallest rear cog. This position will help you get an accurate measurement.
- Measure the chain: Extend the chain to its maximum length by pulling it taut. Take note of the two chain ends, which should both be close to meeting but not overlapping each other.
- Add two links: To determine the new chain length, add two links to the existing chain length. Ensure that the new chain length is equal to the old chain length plus two additional links.
- Remove the excess links: With a chain tool, remove the necessary number of links from the new chain length. Be careful not to damage the chain or any other bike components during this process.
- Reattach the chain: Once you have the correct chain length, reattach it to your bike by connecting the chain ends using a master link or by using a chain tool to secure the links together.
- Check for proper tension: After reinstalling the chain, ensure that it has proper tension by spinning the pedals. The chain should move smoothly and without any slippage or binding.
By determining the new chain length accurately, you can ensure that your bike chain stays in place and functions properly. Follow these steps carefully to avoid any potential issues during the process. Now that you’ve determined the correct chain length, you’re ready to move on to the next stage: adjusting the chain tension.
Stay tuned for more tips on fixing a bike chain that keeps falling off.
Stage 5. Install The New Bike Chain
After following the previous steps to remove the old bike chain and choosing a suitable replacement, it’s now time to install the new chain onto your bike. This stage is crucial to ensure a smooth and secure ride. Here are the key points to keep in mind during the installation process:
- Align the chain properly: Begin by draping the new chain over the front chainring and the rear cassette so that it properly lines up with both. Make sure the chain is correctly positioned on the teeth of both the chainring and cassette.
- Thread the chain through the rear derailleur: Gently pull the chain through the rear derailleur, ensuring it passes above the jockey wheel and below the tension pulley. Properly threading the chain through the rear derailleur will ensure smooth gear shifting.
- Connect the chain: Using a chain tool or quick link, connect the ends of the chain together. Ensure that the chain is properly engaged on both pins of the connecting link or quick link, and that it is securely fastened.
- Test the chain: Check the tension of the chain by gently pulling it away from the chainring. It should have a slight amount of slack, allowing it to move up and down without binding. If the chain feels too tight or too loose, make the necessary adjustments.
- Add lubrication: Before taking your newly installed chain out for a ride, apply a generous amount of chain lubricant. This will help reduce friction and extend the lifespan of your chain.
By following these steps, you should be able to successfully install a new bike chain that stays securely in place. Remember, proper installation is essential for a safe and enjoyable cycling experience. Happy riding!
Cause 1. Loose Bolts
Loose bolts can be one of the common causes of a bike chain constantly falling off. It is frustrating when you’re all set for a ride, but your chain keeps derailing. Don’t worry, this problem can be easily fixed with a few simple steps.
Key Points:
- Loose bolts on the derailleur or chainring can cause the chain to slip off.
- Check the bolts on your derailleur and chainring to ensure they are tightened properly.
- Use a suitable wrench or screwdriver to tighten any loose bolts securely.
- Be careful not to overtighten, as this can lead to other issues.
- It’s a good idea to periodically check these bolts during routine bike maintenance.
Remember, ensuring that all bolts are properly tightened is crucial for the smooth operation and stability of your bike chain. So, tighten those loose bolts and get back on the road hassle-free!
Cause 2. Cog Wear And Tear
Having a bike chain that keeps falling off can be frustrating, especially when you’re in the middle of a ride. While there may be several causes for this issue, one common culprit is cog wear and tear. Over time, the teeth on the cogs can become worn down or damaged, leading to poor chain engagement and potential slipping.
To fix a bike chain that keeps falling off due to cog wear and tear, consider the following key points:
- Inspect the cogs: Start by visually examining the cogs on your bike’s rear cassette or freewheel. Look for signs of wear such as flattened or hooked teeth, which can cause the chain to slip.
- Replace worn cogs: If you notice significant wear or damage, it’s advisable to replace the affected cogs. You can either replace the entire cassette or individual cogs, depending on the extent of the wear.
- Check chain compatibility: When replacing cogs, ensure they are compatible with your chain. Different chain speeds require different cassette or freewheel designs, so make sure you select the correct replacement parts.
- Maintain clean cogs: Regularly clean and lubricate the cogs to minimize wear and extend their lifespan. Use a degreaser and a brush to remove dirt and grime, then apply a suitable lubricant to keep the cogs running smoothly.
- Proper shifting technique: While not directly related to cog wear, practicing proper shifting technique can help prevent unnecessary strain on the cogs. Shift gears smoothly and avoid shifting under heavy load or under excessive chain tension.
By addressing cog wear and tear, you can significantly reduce the chances of your bike chain falling off during rides. Remember to inspect, replace when necessary, maintain cleanliness, and practice proper shifting techniques. Keeping your bike in good working order will not only enhance your riding experience but also extend the lifespan of your drivetrain components.
Cause 3. Poor Quality Shifting Mechanism
If you’ve tried adjusting your bike chain tension and checked for any bent or worn out components, but your chain keeps falling off, the issue may lie with the shifting mechanism. A poor quality shifting mechanism can cause misalignment or inconsistent shifting, leading to the chain slipping off the gears.
Here are some key points to consider:
- Check the derailleur: The derailleur is responsible for moving the chain between the gears. If it’s not properly adjusted or has become worn out, it may not guide the chain accurately, causing it to fall off. Inspect the derailleur for any damage, bent parts, or excessive wear.
- Replace worn components: If your bike’s shifting mechanism is old or worn out, it’s essential to replace the necessary components. This includes the derailleur, derailleur hanger, shifter cables, and cable housing. Upgrading to higher quality shifting components can greatly improve the performance and reliability of your bike’s shifting system.
- Clean and lubricate: Over time, dirt, grime, and dried-up lubricant can affect the smooth operation of the shifting mechanism. Regularly cleaning and lubricating the derailleur, chain, and associated parts can help prevent shifting issues. Use a degreaser to remove any built-up dirt and apply appropriate lubricant to ensure everything moves smoothly.
- Seek professional help: If you’re uncertain about diagnosing or fixing the problem with your bike’s shifting mechanism, it’s recommended to consult a professional bike mechanic. They will have the expertise to identify any underlying issues and carry out the necessary repairs or replacements.
Remember, maintaining a high-quality shifting mechanism is crucial for smooth and accurate gear changes, preventing your bike chain from falling off repeatedly. By addressing any problems promptly and ensuring proper maintenance, you can enjoy a hassle-free riding experience.
Cause 4. Bent Derailleur Hanger
If you find that your bike chain keeps falling off, one possible cause could be a bent derailleur hanger. The derailleur hanger is a small metal component that attaches the rear derailleur to the bike frame. It plays a critical role in keeping the chain aligned and shifting smoothly.
Here are some key points to consider when diagnosing and fixing this issue:
- A bent derailleur hanger can occur due to accidental impacts, mishandling, or general wear and tear. It may not always be obvious to the naked eye, so it’s important to inspect it closely.
- One way to check for a bent derailleur hanger is to visually see if it looks misaligned or bent. You can compare it to a known straight edge, such as the wheel or the bike frame itself.
- Another way to confirm the issue is by observing the shifting performance. If the chain consistently falls off when shifting gears, especially to the higher or lower range, it could indicate a problem with the derailleur hanger.
- Fixing a bent derailleur hanger requires special tools and expertise. It’s best to take your bike to a professional bike shop for an accurate assessment and repair.
- In some cases, a slightly bent hanger can be realigned using a derailleur hanger alignment gauge; however, for severely bent hangers, replacement may be necessary.
- Once the derailleur hanger has been straightened or replaced, be sure to readjust the derailleur’s position and indexing to ensure proper shifting.
Remember, a properly functioning derailleur hanger is crucial for maintaining a smooth and reliable chain operation. By addressing a bent derailleur hanger promptly, you can avoid chain drop issues and enjoy a more efficient and enjoyable bike ride.
Stage Should To Be Follow:
Stage To Follow:
Fixing a bike chain that keeps falling off can be frustrating, especially if you’re in the middle of a ride. However, with a few simple steps, you can get your chain back on track and keep it there. Here’s what you need to do:
Inspect The Chain
- Start by inspecting the condition of your chain. Look for any signs of damage, such as rust, bent links, or excessive wear. If your chain is severely damaged, it may need to be replaced.
Check The Tension
- Ensure that your chain is properly tensioned. A loose chain is more likely to come off the sprockets. To check the tension, push down on the center of the chain. It should have a slight amount of give, without being too loose or too tight.
Properly Align The Chain
- Ensure that your chain is properly aligned with the front and rear sprockets. Misalignment can cause the chain to skip and fall off. Use your eyes to visually inspect the alignment, or use a chain alignment tool if necessary.
Lubricate The Chain
- Regularly lubricating your chain is essential for smooth operation and to prevent it from falling off. Apply a suitable lubricant to the chain, focusing on the areas where it contacts the sprockets.
Check The Chain Tensioner
- If your bike has a chain tensioner, make sure it is properly adjusted. A misaligned or faulty tensioner can cause the chain to come off. Follow the manufacturer’s instructions to check and adjust the tensioner if needed.
Replace Worn Components
- If your chain continues to fall off despite proper tension and alignment, it’s possible that you have worn sprockets or a worn chainring. These components can cause the chain to slip and jump off. Consider replacing them if necessary.
Consider Chain Size
- Ensure that you have the correct chain size for your bike. Using an incorrect chain size can lead to issues with tension and alignment. Consult your bike’s manual or a professional bike shop for guidance on the correct chain size.
Maintain Cleanliness
- Keep your bike chain clean to prevent debris and dirt buildup. Regularly clean your chain with a chain cleaner and a brush. A dirty chain can cause the chain to skip and fall off.
Avoid Cross-Chaining
- Cross-chaining, where the chain is at an extreme angle between the front and rear sprockets, can increase the likelihood of the chain coming off. Avoid riding in extreme gear combinations to reduce the chances of chain derailment.
Get Professional Help
- If you’ve followed all of these steps and your chain still continues to fall off, it may be time to seek professional help. A qualified bike mechanic can diagnose and resolve any underlying issues causing the chain to come off.
By following these steps, you can prevent your bike chain from constantly falling off and enjoy a smoother, more reliable ride. Keep your chain properly tensioned, aligned, and lubricated, and inspect the components regularly to ensure their condition is optimal.
Happy riding!
Stage 1. Check The Manufacturer’S Specifications
Cycling enthusiasts know the frustration of a bike chain that keeps falling off while on a ride. Not only does it disrupt the flow and enjoyment of the ride, but it can also be a safety hazard. Thankfully, fixing a bike chain that keeps falling off is a relatively straightforward process.
In this blog post, we will guide you through the various stages of fixing a bike chain. Let’s start with stage 1, where you need to check the manufacturer’s specifications for your bike.
Checking The Manufacturer’S Specifications
Before embarking on any repairs or adjustments, it’s essential to consult the manufacturer’s specifications for your bike. Here are a few key points to consider:
- Find the bike’s user manual or research the manufacturer’s website for information specific to your bike model.
- Look for the recommended chain type and size. Using the correct chain will ensure smooth performance and reduce the chances of it falling off.
- Check if your bike has a derailleur or a single-speed setup. This will affect the chain tensioning and adjustment process.
- Identify any specific instructions or recommendations regarding chain maintenance, lubrication, and tensioning.
By following the manufacturer’s specifications, you ensure that you address the chain falling off issue effectively and in alignment with the intended design and functionality of your bike. In the next stage, we will dive into assessing the chain tension.
Stay tuned!
Stage 2. Choose A Torque Wrench With The Appropriate Specifications
Choosing the right torque wrench for your bike chain is crucial in preventing it from constantly falling off. Here are the key points to consider:
- Torque range: Look for a torque wrench that has a range suitable for bike chain applications. Typically, torque values for bike chains fall within the 8-14 nm (newton meters) range.
- Accuracy: Ensure that the torque wrench provides accurate readings, as precision is essential when tightening the chain. Look for a wrench with a calibration certificate to guarantee its accuracy.
- Size and weight: Consider the size and weight of the torque wrench, as it will affect its portability and ease of use. Opt for a compact and lightweight wrench that you can easily carry with you during rides.
- Adjustability: Check if the torque wrench allows for easy adjustment of torque settings. This feature is useful when dealing with different chain components that require varying torque levels.
- Quality and durability: Invest in a high-quality torque wrench that will withstand the demands of frequent bike maintenance. Look for wrenches made from durable materials, such as steel, to ensure long-lasting performance.
- Brand reputation: Consider purchasing a torque wrench from a reputable brand known for producing reliable and accurate tools. Research customer reviews to gain insights into the wrench’s performance and durability.
Remember, using a torque wrench with the appropriate specifications will help you achieve the optimal tightness and prevent your bike chain from falling off during rides. Now that you know what to look for, let’s move on to the next stage of fixing your bike chain.
Stage 3. Tighten The Bolts
You’re almost there! In this stage, we’ll focus on tightening the bolts of your bike chain to ensure it stays securely in place. Loose bolts can lead to chain slippage and an unpleasant riding experience. Here’s what you need to do:
- Start by locating the bolts that connect your bike chain to the rear derailleur. These bolts are usually found on the derailleur cage.
- Using a suitable wrench or allen key, tighten the bolts evenly. Make sure not to overtighten them, as this could result in damage to the derailleur or chain.
- Check the tension of the chain after tightening the bolts. The chain should have a slight amount of slack, but not too loose. To gauge the tension, gently pull the chain away from the front chainring. It should move slightly up and down, but not excessively.
- If you find the chain is too loose, you can adjust the tension by using the barrel adjuster on your bike’s derailleur. Turning the barrel adjuster counterclockwise will tighten the chain, while turning it clockwise will loosen it.
- Once you’ve achieved the desired tension, give the chain a few rotations to ensure it stays in place. Listen for any unusual noises or grinding sounds, as these could indicate further adjustments are necessary.
- Finally, give the bolts one last check to ensure they are snug and secure. It’s always a good idea to periodically inspect the bolts, especially after riding over rough terrain or when you notice any chain slippage.
Remember, ensuring your bike chain is properly tightened will greatly enhance your riding experience and prevent any unnecessary mishaps. With the bolts securely tightened, you can confidently hit the road or trail, knowing your chain will stay in place throughout your journey.
Stage 4. Replace The Bolts
Having a bike chain that constantly falls off can be frustrating and inconvenient, but luckily, there are steps you can take to fix the issue. In this stage, we’ll focus on replacing the bolts on your bike chain. By following this process, you’ll ensure that your bike chain stays secure and you can ride smoothly without any worries.
Stage 4: Replace The Bolts
Here are the key points to keep in mind when replacing the bolts on your bike chain:
- Inspect the bolts: Carefully examine the bolts on your bike chain to determine if they are loose, damaged, or worn out. Look for signs of rust or corrosion as well. If any of these issues are present, it’s crucial to replace the bolts.
- Choose the right bolts: Selecting the appropriate type and size of bolts is essential. Make sure to match the specifications of your current bolts to ensure compatibility. Consult your bike’s manual or seek guidance from a professional if needed.
- Remove the old bolts: Use a suitable tool, such as an allen wrench or a socket wrench, to loosen and remove the old bolts from your bike chain. Be cautious not to damage surrounding components in the process.
- Clean the area: Take the time to clean the area around the bolt holes thoroughly. This will help prevent debris or dirt from interfering with the installation of the new bolts.
- Apply thread-locking compound: Before re-attaching the new bolts, apply a small amount of thread-locking compound to the threads. This will help keep the bolts securely in place and prevent them from loosening over time.
- Tighten the bolts: Carefully screw in the new bolts, making sure not to overtighten them. Excessively tight bolts can cause damage or breakage, leading to further issues. Use the appropriate torque specifications if available.
- Check for proper alignment: After replacing the bolts, double-check the alignment of the bike chain. It should be properly seated on the sprockets and not excessively loose or tight. Make any necessary adjustments if needed.
Replacing the bolts on your bike chain is an effective way to address the issue of a chain that keeps falling off. By following these steps carefully, you can enjoy a smooth and secure ride without any unexpected chain mishaps.
Remember to always prioritize safety and consult a professional bike mechanic if you encounter any difficulties or have concerns.
Stage 1. Gauge Cog Wear And Tear
When it comes to fixing a bike chain that keeps falling off, the first stage is to gauge the wear and tear on the cog. This is an important step as it helps identify whether the problem lies with the cog or another component of the bike chain system.
Here are the key points to keep in mind:
- Inspect the cog for any visible signs of wear, such as worn teeth or a broken cog tooth.
- Use a chain wear indicator tool to measure the level of chain elongation, which can indicate excessive wear on the cog.
- Check for rust or corrosion on the cog, as this can affect its performance and cause the chain to come off.
- Ensure that the cog is properly aligned and seated securely on the hub, as misalignment can cause the chain to derail.
By examining the cog closely and addressing any wear or alignment issues, you can take the first step towards fixing a bike chain that keeps falling off. Remember to wear appropriate safety gear and consult a professional if you are unsure about any repair process.
Stage 2. Remove The Worn Cassette
If you own a bike, you may have experienced the frustration of a chain that keeps falling off. Not only is it inconvenient, but it can also be dangerous if it happens while you’re riding. But fear not, because fixing a bike chain that keeps falling off is not as complicated as it may seem.
In this blog post, we will guide you through the process of fixing a bike chain step by step. In stage 2, we will focus on removing the worn cassette. So let’s dive in and get your bike chain back on track.
How To Remove The Worn Cassette:
- First, you will need to gather the necessary tools for this task. You will need a chain whip, a cassette lockring tool, and an adjustable wrench.
- Start by shifting your bike into the smallest chainring and the smallest rear cog. This will make it easier to access and remove the cassette.
- Insert the chain whip into the cassette, ensuring that it is securely in place.
- Using the adjustable wrench, locate the cassette lockring on the outside of the cassette. Turn it counterclockwise to loosen it.
- Once the lockring is loose, you can remove it completely using your hands. Be careful not to misplace any of the small parts.
- With the lockring removed, you can now slide the cassette off the freehub body. Take note of the order and orientation of the cogs for easy reassembly.
- Inspect the cassette for any signs of wear or damage. If you notice any worn or damaged teeth on the cogs, it may be time to replace the cassette.
By following these steps, you can successfully remove the worn cassette from your bike chain. In the next stage, we will cover how to clean the cassette and reassemble the bike chain. Stay tuned for the next part of our guide on fixing a bike chain that keeps falling off.
Stage 3. Install The New Cassette
Now that you have successfully removed the old cassette, it’s time to install the new one. Follow these steps to ensure a smooth installation process:
- Begin by applying a small amount of grease to the splines on the freehub body. This will help the cassette slide on easily and prevent any creaking noises.
- Line up the splines on the cassette with those on the freehub body. You may need to rotate the cassette slightly to align them correctly.
- Slide the cassette onto the freehub body, making sure it is fully seated. Give it a little wiggle to ensure it is securely in place.
- Use a cassette lockring tool to tighten the lockring onto the cassette. This will prevent the cassette from coming loose while cycling.
- Use a chain whip tool to hold the cassette in place while you tighten the lockring. This will ensure the cassette is firmly secured.
- Use a torque wrench to tighten the lockring to the manufacturer’s recommended torque specifications. Over-tightening can damage the cassette and freehub body, while under-tightening can cause the cassette to slip under load.
- Once the lockring is tightened to the correct torque, give it a final check to ensure it is secure. You can do this by trying to wiggle the cassette back and forth – there should be no movement.
- Now that the new cassette is installed, you can proceed with adjusting the derailleur and fine-tuning your shifting.
By following these steps, you will be able to properly install a new cassette on your bike chain. Remember to take your time and double-check your work to ensure a successful installation.
Stage 1. Remove The Handlebar Grip
Bike chains are an essential component of any bicycle, keeping the wheels turning smoothly and allowing you to pedal with ease. However, it can be incredibly frustrating when your bike chain keeps falling off while you’re riding. Not only does it disrupt your ride, but it can also lead to potential accidents and damage to your bike.
In this blog post, we will guide you through the process of fixing a bike chain that keeps falling off, starting with stage 1: remove the handlebar grip.
Removing The Handlebar Grip:
When it comes to fixing a bike chain that keeps falling off, the first step is to remove the handlebar grip. Here are the key points to keep in mind during this stage:
- Start by loosening the screws or bolts that hold the handlebar grip in place. You may need a screwdriver or an allen wrench to do this.
- Once the screws or bolts are loosened, gently twist and pull the grip towards yourself to remove it from the handlebar.
- Be cautious while removing the grip to avoid damaging it or other parts of the bike.
- If the grip is tightly stuck, you can try using a hairdryer to warm it up slightly. This can make it easier to remove.
- Alternatively, you can also use a spray lubricant to loosen the grip before attempting to remove it.
By following these steps, you can easily remove the handlebar grip and proceed to the next stage of fixing your bike chain. Stay tuned for the next part of this series, where we will guide you through the next steps to get your bike chain back on track!
Remember, it’s important to ensure that you have the necessary tools and equipment before starting any repairs on your bike. If you’re unsure about any step or feel uncomfortable making the repairs yourself, it’s always best to seek assistance from a professional bike mechanic.
Stay safe and happy cycling!
Stage 2. Remove The Shifter Cables And Shifter
Now that you have successfully detached your bike chain from the derailleur, it’s time to move on to the second stage of fixing a bike chain that keeps falling off – removing the shifter cables and shifter. This step is crucial to ensure that you can thoroughly inspect and clean these components.
Here’s what you need to do:
Inspecting The Shifter Cables
- Start by locating the shifter cables on your bike. These cables connect the shifters to the derailleurs and are responsible for shifting gears.
- Carefully inspect the cables for any signs of wear and tear, such as fraying or kinks. Damaged cables can cause the chain to jump off the gears, so it’s important to replace them if necessary.
- Check the cable housings for any cracks or damage. If you notice any issues, it’s best to replace both the cables and the housings to ensure smooth shifting.
Detaching The Shifter Cables
- To remove the shifter cables, locate the cable anchor bolt near the shifter on the handlebars. Loosen this bolt using an allen wrench or a cable puller, depending on your bike’s setup.
- Once the bolt is loose, gently pull the cable out of the shifter. Pay attention to how the cable is routed so you can reassemble everything correctly later on.
- Slide the cable out of any cable stops or housings along the frame of the bike, freeing it completely from the bike.
Removing The Shifter
- With the cables detached, you can now proceed to remove the shifter itself. Start by locating the mounting bolt that attaches the shifter to the handlebars.
- Loosen the bolt and carefully slide the shifter off the handlebars. Make sure to keep track of any washers or spacers that may be present.
- Take a moment to inspect the shifter for any damage or signs of wear. If needed, replace the shifter to ensure reliable shifting performance.
By removing the shifter cables and shifter, you are taking the necessary steps to thoroughly assess and clean these components. This process will help ensure smooth gear changes and prevent your bike chain from falling off in the future. In the next stage, we will dive into cleaning and lubricating the chain to complete the maintenance process.
Stay tuned!
Stage 3. Install New Shifting Cables And Shifters
The final stage of fixing a bike chain that keeps falling off is to install new shifting cables and shifters. This step is crucial as it ensures smooth and precise shifting, allowing you to have a well-functioning bike chain. Follow these steps to install new shifting cables and shifters:
Remove The Old Cables And Shifters
Before you can install new shifting cables and shifters, you need to remove the old ones. Use a pair of cable cutters to snip the cables near the shifters and derailleurs. Then, loosen the cable anchor bolts and slide the cables out of the shifters.
Clean The Cable Housing
Inspect the cable housing for any dirt, debris, or rust. If you notice any, clean the housing thoroughly to ensure smooth cable movement. Use a degreaser and a small brush to scrub the housing, and wipe it clean with a rag.
Measure And Cut The New Cables
Take measurements of the old cables to determine the length you need for the new ones. Add a few inches to ensure you have enough length for proper installation. Use cable cutters to cut the new cables to the desired length.
Install The Shifter Cables
Thread the new cables through the cable housing, starting from the shifter end. Make sure the cables slide smoothly through the housing. Insert the cables into the shifters, ensuring they are properly seated. Pull the cables taut, but not overly tight.
Secure The Cable Anchor Bolts
Once the cables are inserted into the shifters, tighten the cable anchor bolts to secure them in place. Be careful not to overtighten, as this can affect cable movement. Check that the cables move freely when you shift gears.
Install The Shifter Units
Next, install the new shifters onto the handlebars. Align them properly and tighten the mounting bolts securely. Ensure the shifters are within easy reach and that they feel comfortable when operating.
Thread The Cables Through The Derailleurs
Guide the cables from the shifters to the derailleurs, making sure they follow the correct path. Insert the cables into the appropriate cable housing ports on the derailleurs. Again, check that the cables slide smoothly through the housing.
Adjust Cable Tension
With the cables in place, adjust the tension to ensure accurate shifting. Shift to the smallest chainring in the front and the smallest cog in the back. Use the barrel adjusters on the derailleurs to fine-tune the cable tension until the chain moves smoothly.
Test The Shifting
Once you have adjusted the cable tension, it’s time to test the shifting. Shift through all the gears, both in the front and rear, to ensure smooth and precise shifting. If you notice any issues, such as sluggish shifting or skipping gears, make further adjustments as needed.
Final Checks
Double-check that all bolts are tightened securely and that the cables are properly seated in the shifters and derailleurs. Give your bike a quick test ride to make sure everything is working as it should.
By following these steps, you can successfully install new shifting cables and shifters, ensuring a bike chain that stays securely in place and provides smooth shifting for an enjoyable ride.
Stage 4. Reattach The Grip And Test The Installation
Reattach The Grip:
Now that the chain is properly aligned and tensioned, it’s time to reattach the grip securely. Follow these steps to ensure a smooth and reliable reinstallation:
- Start by placing the grip back onto the handlebar, making sure it sits snugly in its original position.
- Align the grip with any markings or indentations on the handlebar, if present, to ensure proper positioning.
- Slide the grip onto the handlebar, applying firm pressure to secure it in place.
- If the grip is a lock-on type, locate the lock ring provided and tighten it to prevent any movement.
- For non-lock-on grips, use a suitable adhesive or grip glue to fix it firmly onto the handlebar.
Test The Installation:
After reattaching the grip, it’s crucial to test the bike chain’s reinstallation to ensure optimal performance. Follow these steps to ensure everything is in working order:
- Pedal the bike slowly, carefully observing the movement and tension of the chain.
- Shift through the bike’s different gears to test the chain’s ability to smoothly engage with the drivetrain.
- Pay attention to any unusual noises, skipping gears, or excessive slack in the chain.
- Check the grip’s stability and comfort while riding, making any necessary adjustments for a better riding experience.
- Take the bike for a short test ride, ensuring that the chain remains on the gears without any issues.
By reattaching the grip and testing the installation, you have completed the last stage of fixing a chain that keeps falling off. Keep in mind that regular maintenance and proper use of your bike will help prevent future chain-related problems.
Happy cycling!
Stage 1. Inspect The Derailleur Hanger For The Defective Part
If you’re tired of dealing with a bike chain that keeps falling off, don’t worry, you’re not alone. It can be frustrating to have your chain constantly derailing, interrupting your smooth ride. But before you give up on your bike or rush to the nearest bike shop, there are a few steps you can take to fix the issue.
Inspect The Derailleur Hanger:
- Check for any visible damage: Begin by carefully examining the derailleur hanger, which is the part of your bike frame that holds the derailleur in place. Look for signs of bends, cracks, or other forms of damage that may affect its functionality. If any damage is detected, it’s crucial to replace the hanger before proceeding further.
- Align the hanger: Attach a derailleur alignment tool to the derailleur hanger, ensuring it is properly aligned. The tool will help you straighten any misalignment, which may be the cause of the chain falling off frequently.
- Inspect derailleur components: Examine the derailleur itself, checking for any loose parts or components that may be causing the chain to drop. Tighten any loose bolts or screws and ensure the derailleur is securely attached to the hanger.
By thoroughly inspecting the derailleur hanger and its components, you can identify any faulty parts that may be causing your chain to fall off. Remember, it’s essential to address these issues promptly to prevent further damage and ensure a safer and more enjoyable biking experience.
Stage 2. Manually Bend The Derailleur Hanger
Stage 2: Manually Bend The Derailleur Hanger
When it comes to fixing a bike chain that keeps falling off, one of the key steps is manually bending the derailleur hanger. This small but crucial component can easily become misaligned, causing the chain to constantly jump off the gears.
By following these steps, you can ensure that your derailleur hanger is properly aligned and eliminate the annoyance of a constantly falling bike chain.
Here are the key points to keep in mind while manually bending the derailleur hanger:
- Inspect the derailleur hanger: Before attempting any adjustments, visually inspect the derailleur hanger for any obvious signs of damage or misalignment. Look for bends, cracks, or other irregularities that may require professional intervention.
- Remove the derailleur: To gain better access to the derailleur hanger, it is recommended to remove the derailleur from the bike. This will allow you to work more comfortably and accurately.
- Use a derailleur alignment tool: Invest in a derailleur alignment tool, also known as a derailleur hanger alignment gauge. This tool will help you determine the precise positioning of the derailleur hanger and identify any misalignments.
- Align the derailleur hanger: With the alignment tool in hand, carefully position it against the derailleur hanger. Make sure the tool is flush against the hanger and adjust it according to the manufacturer’s instructions.
- Apply gentle force: Slowly and gently apply force to the alignment tool, guiding the derailleur hanger back into its correct position. Take your time and make small adjustments until the hanger is straightened.
- Check the alignment: After bending the derailleur hanger, reattach the derailleur to the bike and test the chain’s performance. Shift through the gears and observe if the chain remains properly engaged on the cogs.
Remember, if you are uncomfortable or unsure about manually bending the derailleur hanger, it is always best to seek assistance from a professional bike mechanic. But with a little patience and the right tools, you can successfully fix a bike chain that keeps falling off by manually bending the derailleur hanger.
Stage 3. Remove The Derailleur Hanger
As you progress with fixing a bike chain that keeps falling off, stage 3 requires you to remove the derailleur hanger. This is an essential step in the process, and by following the steps below, you’ll be able to successfully complete it.
Key Points:
- Carefully inspect the derailleur hanger for any signs of damage or bending. If it appears to be bent, it will need to be replaced.
- Start by using an allen wrench to remove the bolt that attaches the derailleur hanger to the derailleur dropout. This may require some force, so ensure that you have a firm grip on the wrench.
- Once the bolt is removed, gently slide the derailleur hanger out of the derailleur dropout. Take care not to damage the dropout or any other components in the process.
- Inspect the derailleur hanger for any debris or dirt that may have accumulated. Use a clean cloth or brush to remove any such debris before proceeding.
- Check the threads on both the derailleur hanger and the derailleur dropout. If there is any damage or cross-threading, it is advisable to seek professional assistance or replace the affected components.
By following these steps, you’ll be able to remove the derailleur hanger effectively and move on to the next stage of fixing your bike chain. Remember, it’s crucial to handle each step with care to avoid causing further damage to your bike.
So let’s get started and have your bike chain working flawlessly in no time!
Stage 4. Install A New Derailleur Hanger
So, you’ve tried adjusting your bike chain, but it still keeps falling off. Don’t worry, there’s still hope! The next step is to install a new derailleur hanger. This crucial part of your bike’s drivetrain system ensures that the chain moves smoothly between gears.
Here are the key points you need to know about this stage:
- Inspect the derailleur hanger: Begin by examining the current derailleur hanger for any signs of damage or misalignment. If it’s bent or cracked, it could be the root cause of your chain issues.
- Get the right replacement: Check the make and model of your bike to ensure you purchase the correct derailleur hanger. Bike manufacturers usually sell compatible replacements that will fit your specific bike frame.
- Remove the old hanger: Begin by removing the rear derailleur from the derailleur hanger. Then, using the appropriate tools, carefully detach the old hanger from the frame. Take note of how it is positioned so you can install the new one correctly.
- Install the new hanger: Fit the new derailleur hanger onto your bike frame, aligning it properly with the mounting holes. Use the necessary tools to secure it tightly. Double-check that it is positioned correctly by comparing it to the previous hanger’s alignment.
- Reattach the rear derailleur: Once the new hanger is securely in place, reattach the rear derailleur to the hanger. Ensure it is properly aligned with the chain and gears. Make any necessary adjustments to achieve smooth shifting.
By following these steps and installing a new derailleur hanger, you’re one step closer to fixing that nagging chain problem. Your bike will be ready to hit the road or trails again, ensuring a smooth and enjoyable ride.
Stage 5. Test The New Hanger
Fixing a bike chain that keeps falling off can be a frustrating experience. After going through the previous stages of cleaning, lubricating, adjusting the derailleur, and checking the chain tension, it’s time to move on to stage 5: testing the new hanger.
This crucial step will help determine if the issue has been resolved or if further adjustments are needed. Below, we will explore the key points and steps to take during this testing process.
Key Points For Testing The New Hanger:
- Ensure the bike is in a safe and stable position before proceeding with the test.
- Carefully engage the pedals and observe the chain’s behavior as it moves through the gears.
- Pay close attention to any signs of jumping, slipping, or falling off the gears.
- Test the bike’s performance in various terrains and at different speeds to get a comprehensive assessment.
- Make note of any unusual noises or vibrations that may indicate further issues.
- If the chain continues to fall off or show signs of instability, it could be an indication of a different underlying problem that needs addressing.
- Consult with a professional bike mechanic for further assistance if necessary.
Testing the new hanger is crucial to confirm whether the previous steps solved the issue of the chain falling off. By observing the chain’s behavior, performance, and any additional signs of trouble, you can make an informed decision on whether the problem has been successfully resolved.
Remember to stay vigilant during the testing process and take note of any recurring issues that may require additional attention.
Stage 1. Inspect The Rear Derailleur
Before diving into fixing a bike chain that keeps falling off, it’s crucial to inspect the rear derailleur. This component plays a vital role in ensuring the chain shifts smoothly between gears. Here are the key points to consider when inspecting your rear derailleur:
- Check for any visible damage or misalignment in the derailleur. Look for signs of bent plates, loose bolts, or excessive wear that may affect its performance.
- Examine the jockey wheels or pulley wheels. Make sure they spin freely and aren’t worn down. If they are worn, consider replacing them to maintain optimal chain movement.
- Verify the tension of the derailleur’s pivot point. Ensure that it moves smoothly without any stiffness or excessive play.
- Inspect the gear hanger, which connects the rear derailleur to the bike frame. If it looks bent or damaged, it can affect the shifting precision and cause the chain to fall off.
- Clean the derailleur thoroughly, removing any dirt, grime, or debris that might hinder its functionality. A clean derailleur ensures smooth shifting and minimizes the risk of chain issues.
Inspecting the rear derailleur is the first step in diagnosing and fixing a bike chain that keeps falling off. By carefully examining this crucial component, you’re on your way to getting your bike back in top shape. In the next stage, we’ll explore another important aspect of the chain’s behavior.
So let’s continue our journey to discover the potential causes and solutions to this common problem. Stay tuned!
Stage 2. Fully Extend The Rear Derailleur
Stage 2. Fully extend the rear derailleur:
Now that you have successfully removed the bike chain from the rear cassette, it’s time to move on to the next stage: fully extending the rear derailleur. This part is crucial in ensuring that the chain stays in place and doesn’t keep falling off during your rides.
Follow these steps to complete this stage:
Adjust The B-Screw:
- The b-screw is a small screw located on the rear derailleur near the jockey wheels.
- Loosen the screw with a screwdriver to enable the derailleur to move freely.
- Extend the derailleur by turning the b-screw clockwise, increasing the gap between the derailleur and the cassette.
- Re-tighten the b-screw once the desired extension is achieved.
Check The Chain Tension:
- A loose chain can easily come off the cassette, leading to chain drops.
- Make sure the chain has proper tension by pulling it at various points along the drivetrain.
- Ideally, the chain should have a slight amount of sag but not be too loose.
- Adjust the tension by using the barrel adjuster on the rear derailleur or by repositioning the rear wheel slightly if necessary.
Align The Derailleur Hanger:
- A bent derailleur hanger can cause the chain to constantly derail.
- Inspect the hanger for any signs of misalignment or damage.
- Use a derailleur hanger alignment tool to straighten the hanger if required.
- Proper alignment ensures that the chain runs smoothly through the rear derailleur.
By fully extending the rear derailleur and following these steps, you’ll significantly reduce the chances of your bike chain falling off. Remember to double-check your adjustments and test your bike before hitting the road again. With a properly functioning rear derailleur, your rides will be a lot smoother and more enjoyable.
Stage 3. Expose The Limit Screws
Once you have identified the cause of your bike chain repeatedly falling off, it’s time to move on to the next stage – exposing the limit screws. These screws play a crucial role in determining how far your bike’s front and rear derailleurs can shift.
By adjusting these screws, you can ensure that the chain stays in place and shifts smoothly. So, let’s dive into the key points of this stage:
- To expose the limit screws, you need to shift your bike chain onto the smallest chainring at the front and the smallest cog at the back.
- Locate the two limit screws, usually labeled “l” and “h,” on your rear derailleur. The “l” screw controls the outermost position, while the “h” screw controls the innermost position.
- Use a screwdriver that matches the screw heads and turn the “l” screw counterclockwise to expose the inner limit screw and clockwise to hide it.
- Next, adjust the “h” screw by turning it clockwise to expose the outer limit screw and counterclockwise to hide it. This will fine-tune the position of your derailleur.
- Keep testing the shifting of your bike chain after each adjustment until it no longer falls off. Remember, small adjustments can make a big difference.
- If you find that your chain still doesn’t stay in place, you may need to consult a professional bike mechanic who can provide further assistance.
Now that you understand the key points of exposing the limit screws, let’s move on to the next stage: adjusting the rear derailleur.
Stage 4. Adjust The Limit Screws
Adjusting the limit screws on your bike is an essential step in ensuring that your chain stays in place while you ride. These screws control the movement of the derailleur, preventing the chain from shifting too far and falling off the gears.
Follow these steps to properly adjust the limit screws and keep your bike chain secure.
Key Points:
- Check the position of the derailleur: Start by ensuring that the derailleur is properly aligned with the chain and the gears. It should be parallel to the chain and at the correct distance.
- Locate the limit screws: Look for two small screws marked with an ‘h’ and an ‘l’. The ‘h’ screw controls the high gear, while the ‘l’ screw adjusts the low gear.
- Adjust the high gear limit: Shift your bike into high gear and turn the ‘h’ screw clockwise to align the jockey wheel with the outermost gear. Rotate the pedals to check for any chain rubbing.
- Adjust the low gear limit: Shift your bike into the lowest gear and turn the ‘l’ screw clockwise until the jockey wheel lines up with the innermost gear. Again, rotate the pedals to ensure smooth shifting without chain rubbing.
- Fine-tune the limit screws: Take your bike for a test ride and shift through all the gears. Pay attention to any chain derailment or rubbing. If necessary, make small adjustments to the limit screws to achieve optimal performance.
By properly adjusting the limit screws, you can significantly reduce the chances of your bike chain falling off during your rides. Follow the steps above, and you’ll be back on the road with a secure and reliable chain in no time.
Happy riding!
Stage 5. Adjust The Inner Wire Tension
Now that you have checked the chain for any obvious issues and the derailleur alignment, it’s time to move on to adjusting the inner wire tension. This step is crucial in ensuring that the bike chain stays securely in place and doesn’t fall off during your ride.
Here are the key points to keep in mind:
- Check for proper cable tension: Start by examining the cable tension. If it’s too loose, the chain may fall off easily. If it’s too tight, shifting gears will become difficult.
- Locate the barrel adjuster: The barrel adjuster is typically found where the cable enters the derailleur or near the shifter. This small threaded component allows you to fine-tune the cable tension.
- Turn the barrel adjuster: To increase cable tension, turn the barrel adjuster clockwise. To decrease tension, turn it counterclockwise. Make small adjustments, about half a rotation at a time, until you find the sweet spot.
- Test the chain: After making adjustments, pedal the bike and shift through the gears to ensure smooth and precise shifting. If the chain still falls off, you may need to repeat the process and make further adjustments.
Remember, finding the right balance in cable tension may take some trial and error. Be patient and make gradual adjustments until your bike chain stays in place throughout your rides.
By following these simple steps, you can easily fix a bike chain that keeps falling off. Get back on the road with confidence and enjoy a smooth and uninterrupted riding experience. Keep in mind that regular maintenance and inspection will help prevent issues like chain derailment in the future.
Happy riding!
Stage 6. Adjust The B Angle
Fixing a bike chain that keeps falling off can be frustrating, but don’t worry, we’re here to help! In this stage of our guide, we’ll focus on adjusting the b angle of your bike chain. By properly aligning the chain, you can prevent it from slipping off and ensure a smooth ride.
So let’s dive right in and get your bike back on track!
Key Points:
- Simple adjustments to the b angle can help keep your bike chain in place.
- Proper alignment of the chain is crucial for smooth gear shifting and chain retention.
- Follow these steps to adjust the b angle and fix your slipping bike chain:
- Start by locating the rear derailleur on your bike.
- Loosen the bolt or screws holding the derailleur in place.
- Gently move the derailleur to adjust the angle of the chain.
- Pay attention to the bottom bracket and frame alignment while adjusting.
- Once you’ve made the necessary adjustments, tighten the bolt or screws securely.
- Check if the chain is properly aligned and test for any slippage.
- If you’re uncertain about making these adjustments yourself, it’s always best to consult a professional bike mechanic. They have the expertise to fine-tune your bike for optimal performance.
Remember, maintaining the b angle of your bike’s chain is crucial for its overall functionality. By following these simple steps, you’ll be well on your way to fixing a bike chain that keeps falling off. So go ahead and give it a try – happy biking!
Stage 7. Test The Derailleur
Congratulations! You’re almost done fixing your bike chain that keeps falling off. Now it’s time to move on to the final stage – testing the derailleur.
Key Points To Keep In Mind:
- Begin by shifting the gears to the highest setting on your bike. This will position the derailleur in the outermost position.
- Inspect the chain to ensure it is properly aligned with the gears. It should run smoothly and not rub against the derailleur or any other components.
- Next, shift the gears down to the lowest setting. Again, examine the chain to ensure it is properly aligned and not rubbing against any components.
- Move the pedals and shift through the gears to ensure smooth and accurate shifting. Pay attention to any skipping or hesitation in the gears.
- If you notice any issues with shifting, such as the chain not moving smoothly between gears or skipping gears altogether, you may need to make further adjustments to the derailleur. Refer back to the earlier stages of this guide for instructions on how to make these adjustments.
By thoroughly testing the derailleur, you can ensure that your bike chain will stay in place and provide you with reliable and smooth shifting. Take the time to make any necessary adjustments to ensure optimal performance.
Remember, practice makes perfect, so don’t be discouraged if it takes a few tries to get everything just right. Once you’ve successfully completed this stage, your bike chain should no longer fall off, and you’ll be ready to hit the road or trail with confidence.
Happy riding!
Stage 8. Replace The Rear Derailleur
Your bike chain falling off can be a frustrating and potentially dangerous issue. If you’ve followed the previous stages of fixing a bike chain and it still keeps falling off, it may be time to consider replacing the rear derailleur.
The rear derailleur is responsible for moving the chain across the different gears, and if it’s worn or damaged, it can cause the chain to fall off. In this stage, we’ll guide you through the steps to replace the rear derailleur and get your bike chain back on track.
Key Points To Consider When Replacing The Rear Derailleur:
- Inspect the rear derailleur: Before replacing the rear derailleur, carefully examine it for any visible damage or signs of wear. Look for bent or broken parts, excessive rust, or any other issues that could be causing the chain to fall off.
- Choose the right derailleur: When selecting a new rear derailleur, ensure that it is compatible with your bike’s drivetrain system. Check the number of gears on your bike, the brand compatibility, and the derailleur’s maximum capacity to make the right choice.
- Gather the necessary tools: To replace the rear derailleur, you’ll need a few basic tools such as a set of allen wrenches, a phillips screwdriver, and possibly a chain tool. Make sure you have everything on hand before starting the process.
- Remove the old derailleur: Begin by shifting the chain onto the smallest chainring and the smallest rear cog. This relieves tension on the derailleur, making it easier to remove. Use the appropriate tool to loosen the mounting bolt and carefully detach the derailleur from the derailleur hanger.
- Install the new derailleur: Align the new derailleur with the derailleur hanger and secure it in place with the mounting bolt. Ensure that it is properly aligned and tightened, avoiding overtightening that could cause damage.
- Adjust derailleur tension: Once the new derailleur is installed, you’ll need to adjust the tension to ensure smooth gear shifting. Follow the manufacturer’s instructions or consult a bike mechanic if you’re unsure about this step.
- Check shifting accuracy: After adjusting the tension, carefully shift through all the gears to verify that the chain moves smoothly and accurately across the cassette. Make any necessary fine-tuning adjustments if the shifting is not precise.
- Test the bike chain: Finally, take your bike for a short test ride to ensure that the chain no longer falls off and that the gears shift properly. If the issue persists, it may be a sign of another underlying problem that requires further inspection.
Replacing the rear derailleur may seem like a complex task, but by following these steps and taking your time, you can successfully fix a bike chain that keeps falling off. Remember, if you are unsure about any step or encounter difficulties, it’s always a good idea to seek assistance from a professional bike mechanic.
Keep your bike in top condition and enjoy a smooth, trouble-free ride.
Stage 1. Set Up The Front Derailleur
Stage 1: Set Up The Front Derailleur
Setting up the front derailleur is an essential step in fixing a bike chain that keeps falling off. A properly adjusted front derailleur ensures smooth shifting between the chainrings, minimizing chain drops and improving overall performance. Here are the key points to consider:
- Proper alignment:
- Align the derailleur cage with the chainrings to ensure it sits parallel to them.
- Use the limit screws to position the derailleur so that it doesn’t rub against the chain in any gear.
- Cable tension:
- Connect the derailleur cable securely and adjust the tension.
- Ensure the cable has enough tension to move the derailleur smoothly but not too tight that it causes issues.
- High and low limit screws:
- Adjust the high and low limit screws to control the range of movement of the front derailleur.
- The high limit screw prevents the chain from falling over the outer chainring, while the low limit screw prevents it from shifting off the inner chainring.
- Barrel adjuster:
- Fine-tuning the shifting performance can be done using the barrel adjuster.
- Rotate the barrel adjuster to adjust the cable tension for precise shifts.
By following these key points, you can successfully set up your front derailleur and minimize chain drops. In the next stage, we’ll address another crucial aspect of fixing a bike chain that keeps falling off. Stay tuned!
Remember, proper setup and adjustment of the front derailleur are crucial for the smooth operation of your bike’s drivetrain.
Stage 2. Set The Height And Rotational Angle
Now that you’ve resolved the issues with the tension and alignment, it’s time to move on to the next stage of fixing a bike chain that keeps falling off. Setting the height and rotational angle of the derailleur is crucial to ensure smooth shifting and prevent the chain from slipping off again.
In this stage, we will focus on two key points: adjusting the height and fine-tuning the rotational angle.
Adjusting The Height:
- Begin by shifting the chain onto the smallest chainring in the front and the smallest cog in the rear.
- Loosen the derailleur clamp bolt that holds it to the derailleur hanger.
- Gently push the derailleur upwards or downwards until it aligns perfectly with the chain. Ideally, there should be a small gap between the derailleur and the top of the teeth on the largest chainring.
- Tighten the derailleur clamp bolt securely, ensuring it remains in the correct position.
Fine-Tuning The Rotational Angle:
- Shift the chain to the smallest chainring and the smallest cog.
- Observe the alignment of the derailleur pulley wheels with the cog. The top pulley should line up precisely with the cog’s teeth, while the bottom pulley should be slightly behind.
- If the alignment isn’t accurate, use the barrel adjuster on the derailleur to make small adjustments. Turning it clockwise will move the derailleur outwards, and turning it counterclockwise will move it inward.
- Shift through the gears and ensure the chain moves smoothly across the cassette without any hesitation or skipping. Make any necessary adjustments using the barrel adjuster until the shifting is crisp and precise.
By following these steps and adjusting the height and rotational angle of your derailleur correctly, you’ll significantly decrease the chances of your bike chain falling off. Remember to take your time and make small adjustments as needed. In the final stage, we’ll look at checking the chain length and installing a new chain if necessary.
Stay tuned!
Stage 3. Adjust The Upper Limit Setting
Fixing a bike chain that keeps falling off can be quite frustrating. Whether you’re an experienced cyclist or a casual rider, dealing with a constantly derailing chain can put a damper on your biking experience. However, fear not! In this blog post, we will walk you through the step-by-step process of fixing a bike chain that keeps falling off.
In stage 3, we will focus on adjusting the upper limit setting, which plays a crucial role in preventing the chain from falling off. So, let’s dive into it!
Adjust The Upper Limit Setting:
When it comes to fixing a bike chain that keeps falling off, adjusting the upper limit setting is a crucial step. This adjustment determines the highest position the derailleur can move the chain towards the outer edge of the cassette.
Here are the key points to keep in mind:
- Start by identifying the upper limit adjustment screw, which is usually labeled “h” on most derailleurs. This screw controls how far the derailleur can move towards the outer edge of the cassette.
- Loosen the upper limit adjustment screw using a screwdriver. This will allow for adjustment.
- Ideally, you want the upper pulley of the derailleur to be aligned with the outermost chainring without touching it. This prevents the chain from falling off when shifting to the highest gear.
- Turn the upper limit adjustment screw clockwise if the chain is falling off the chainring when in the highest gear. This will limit the movement of the derailleur towards the outer edge of the cassette.
- Conversely, if the chain hesitates to shift into the highest gear or makes noise when in the highest gear, turn the upper limit adjustment screw counterclockwise to allow for more movement of the derailleur towards the outer edge of the cassette.
- Make small adjustments, quarter turns at a time, until the chain smoothly moves from the second-to-last to the outermost chainring without falling off or making excessive noise.
- Test the adjustment by shifting through all gears while riding your bike. Ensure that the chain securely stays on the chainring when in the highest gear.
- Keep in mind that other factors, such as wear on the chain or the chainring, may contribute to the chain falling off. Regular maintenance and inspection of these components are essential to keep your bike running smoothly.
By properly adjusting the upper limit setting, you can minimize the risk of your bike chain constantly derailing. Now that you’ve adjusted the upper limit, move on to the final stage of fixing a bike chain that keeps falling off: fine-tuning the shifting.
Stay tuned for the next part of our guide, where we’ll delve into this last step.
Remember, with a little patience and some handy tools, you can easily fix a bike chain that keeps falling off. Happy riding!
Stage 4. Adjust The Lower Limit Setting
Now that you have addressed the previous stages and made sure all the components of your bike chain are clean and properly aligned, it’s time to shift the focus to adjusting the lower limit setting. This crucial step will help prevent your bike chain from falling off while you ride.
Follow these key points to ensure a smooth and secure cycling experience:
- Check the position of the front derailleur: Make sure that the front derailleur is properly aligned with the chain rings. If it is not, adjust the position according to the manufacturer’s instructions.
- Identify the low gear: Lower gears refer to small chain rings in the front and larger cogs in the rear. Identify the low gear so you can properly adjust the lower limit setting.
- Locate the low limit screw: The low limit screw is usually labeled “l” on the front derailleur. It determines how far inward the derailleur can move, preventing the chain from shifting too far off the smallest chain ring.
- Start adjusting the low limit screw: Begin by shifting the chain onto the smallest chain ring. Then, turn the low limit screw clockwise in small increments until the derailleur is aligned perfectly with the chain. You may need to test the adjustment by shifting through the gears to ensure smooth transitions.
- Fine-tune as needed: If the chain still falls off, you may need to make further adjustments to the low limit screw. Turn it clockwise to move the derailleur slightly inward or counterclockwise to allow it to move outward. Test the gears after each adjustment to find the optimal setting.
By properly adjusting the lower limit setting, you can significantly reduce the chances of your bike chain falling off during your rides. Take the time to fine-tune this setting and enjoy a hassle-free cycling experience.
Stage 5. Set The Inner Wire Tension
Imagine this scenario: you’re out for a leisurely bike ride when suddenly, your chain slips off again. It’s frustrating, to say the least. But fear not, fellow cyclist! Stage 5 of fixing your bike chain is here to save the day.
In this stage, we’ll be tackling the inner wire tension. By properly adjusting this tension, you’ll be well on your way to a smoother and more reliable bike ride. So let’s dive in and learn how to set the inner wire tension like a pro!
Key Points:
- Ensure that your bike is in the correct gear before starting this step.
- Start by locating the barrel adjuster, which is typically found where the shift cable enters the rear derailleur.
- Turn the barrel adjuster clockwise to increase tension and counterclockwise to decrease tension.
- Make small adjustments to the barrel adjuster and test the shifting to determine the ideal tension.
- Keep in mind that different bikes may require slightly different adjustments, so it’s important to pay attention to how your specific bike responds.
By setting the inner wire tension correctly, you’ll prevent your bike chain from constantly falling off during rides. So go ahead and give it a try, and get ready for smoother and more enjoyable cycling adventures!
Stage 6. Test The Front Derailleur’S Performance
Bike chain issues can be a real pain, especially when it keeps falling off. But worry not! There are several steps you can take to fix this problem and get back to enjoying your ride. In this stage, we’ll focus on testing the front derailleur’s performance, as it plays a crucial role in guiding the chain between gears.
Follow the steps below to ensure your front derailleur is in top shape:
Check For Proper Adjustment:
- Ensure that the derailleur is properly aligned with the chainrings. It should be parallel to the chainrings and not tilted.
Evaluate Chain Movement:
- Shift to the smallest chainring and pedal slowly while observing the chain as it moves between the chainrings. Pay attention to any signs of sluggishness, hesitation, or chain rubbing against the derailleur cage.
Fine-Tune The Limit Screws:
- If you notice any issues, it might be due to incorrect limit screw adjustments. These screws control the maximum inward and outward movement of the front derailleur. Use a screwdriver to make slight adjustments to achieve smooth movement without any rubbing or chain dropping.
Test Shifting Performance:
- Next, it’s time to test how well your front derailleur shifts between different chainrings. Shift through all the gears while closely monitoring the chain’s movement. Ensure the chain smoothly transitions between chainrings without falling off or skipping gears.
Adjust Cable Tension If Needed:
- If the shifting feels sluggish or the chain is not shifting properly, you may need to adjust the cable tension. Use the barrel adjuster located on the front derailleur or at the handlebar to fine-tune the tension. Make small adjustments and test the shifting after each adjustment.
Verify Alignment:
- Lastly, check the alignment of the derailleur cage with the chain. The cage should be parallel to the chain when positioned over the smallest chainring. If it is misaligned, gently adjust it until it sits parallel and does not touch the chain during operation.
By following these steps and ensuring your front derailleur is functioning optimally, you can significantly reduce the chances of your bike chain falling off. Keep in mind that regular maintenance and occasional checks are essential to keep your bike in top shape for a smooth and enjoyable ride.
Happy cycling!
Stage 7. Replace The Front Derailleur
Do you find yourself frustrated with a bike chain that keeps falling off? Don’t worry, we’ve got you covered! In this stage, we’ll tackle the issue by replacing the front derailleur. Replacing the front derailleur can help ensure that your chain stays in place and your ride goes smoothly.
So let’s dive in and learn how to fix that pesky problem once and for all.
Key Points:
- A front derailleur is an essential component of your bike’s drivetrain system that helps move the chain between the chainrings.
- Over time, the front derailleur can become misaligned or damaged, causing the chain to fall off during rides.
- Here’s how you can replace the front derailleur to fix the issue:
- Start by removing the old front derailleur from its mounting bracket. Loosen the clamp bolt, slide the derailleur off, and disconnect the cable from the derailleur.
- Next, align the new front derailleur with the mounting bracket and slide it into place. Make sure it’s positioned correctly and securely tighten the clamp bolt.
- Reconnect the cable to the front derailleur, ensuring it is properly tensioned and securely fastened.
- Finally, check the alignment and adjustment of the front derailleur. Make any necessary tweaks to ensure smooth shifting and chain retention.
By following these steps and replacing the front derailleur, you’ll be able to fix that annoying issue of your bike chain constantly falling off. Keep in mind that if you’re not confident in your mechanical skills, it’s always a good idea to consult a professional bike mechanic.
Happy riding!
Cause 1. Excess Lube
Cause 1: Excess Lube
Does your bike chain keep falling off? One possible cause for this frustrating issue could be excess lube. While it’s important to lubricate your bike chain regularly to prevent wear and tear, using too much lubricant can actually do more harm than good.
Here are some key points to consider:
- Using excessive amounts of lube can attract dirt and debris, which can eventually lead to chain slippage or even chain derailment.
- When the chain is over-lubricated, it becomes sticky and tends to accumulate more grit and grime from the road. As a result, the chain loses traction and falls off more easily.
- Applying the right amount of lube is crucial. Too little can cause friction and premature wear, while too much can create a messy and troublesome situation.
- It’s important to follow the manufacturer’s recommendations regarding the type and quantity of lube to use. This ensures that your chain is properly lubricated without the risk of excess buildup.
- Regularly inspect and clean your bike chain to remove any excess lube or accumulated dirt. This will help maintain optimal chain performance and prevent it from slippage.
So, if your bike chain keeps falling off, excess lube could be the culprit. Pay attention to the amount of lubricant you use and make sure to clean your chain regularly for a smoother, more reliable ride.
Cause 2. Incompatible Drivetrain Components
Sometimes, the reason your bike chain keeps falling off is because of incompatible drivetrain components. These are the parts of your bike that help transfer power from your pedals to the wheels. When these components do not work together smoothly, it can cause your chain to jump or come off altogether.
Here are some key points to understand about incompatible drivetrain components:
- Incompatible gear ratios: If you have mismatched gear ratios, it can put unnecessary stress on the chain, causing it to fall off. Make sure that your front and rear gears are compatible with each other in terms of teeth count.
- Incorrect chain length: Using a chain that is too long or too short for your drivetrain can lead to chain slippage. A longer chain can sag, making it more likely to derail, while a shorter chain may not be able to reach all the gears properly.
- Worn-out components: Over time, the components of your drivetrain can wear out, resulting in misalignment and causing your chain to derail. Regularly inspect and replace any worn-out or damaged components such as the chainrings, derailleur, or cassette.
- Inadequate chain tension: Proper chain tension is crucial for the smooth functioning of your drivetrain. If your chain is too loose or too tight, it can cause shifting issues and chain drops. Adjust the tension by either tightening or loosening the rear derailleur as needed.
- Incompatible chain width: Different drivetrain systems have different chain widths. Using the wrong chain width for your specific drivetrain can cause poor shifting and chain derailment. Ensure that you are using a chain that is compatible with your drivetrain system.
Remember, it’s important to have compatible drivetrain components to ensure the smooth operation of your bike chain. Address any compatibility issues to prevent chain slippage and enjoy a trouble-free ride.
Cause 3. Rough Terrains
Riding a bike can be an enjoyable experience, but when your bike chain keeps falling off, it can quickly become frustrating and inconvenient. There are a few common causes for a bike chain falling off, and one of them is rough terrains.
When you’re riding on uneven surfaces or tough trails, the chain can easily come loose and derail. Let’s take a closer look at this particular cause and explore some key points to help you fix a bike chain that keeps falling off.
Rough Terrains
Riding on rough terrains can put extra strain on your bike chain, causing it to fall off frequently. Here are some important things to consider when dealing with this issue:
- Chain tension: Rough terrains can cause the chain to bounce around, leading to excess slack. Make sure the chain is properly tensioned to reduce the chances of it derailing.
- Chainring condition: Check the condition of your chainring. If it is worn out or bent, it can easily cause the chain to come off. Replace the chainring if necessary.
- Chain lubrication: Lubricate the chain regularly to ensure smooth movement and reduce the likelihood of it getting stuck or falling off.
- Bumpy surfaces: Be mindful of the terrain you’re riding on. Try to avoid excessively bumpy surfaces or trails with large rocks or potholes that can jolt the chain loose.
- Proper gear selection: Use appropriate gears when riding on rough terrains. Avoid extreme gear combinations that can put unnecessary strain on the chain, increasing the risk of it falling off.
By following these tips and taking precautions specific to rough terrains, you can minimize the occurrence of your bike chain falling off. Keep in mind that regular maintenance and proper care are essential for keeping your bike in optimal condition and ensuring a smooth ride every time.
Cause 4. Bent Chainring Or Chainring Teeth
Cause 4: Bent Chainring Or Chainring Teeth
A bent chainring or damaged chainring teeth can be another cause of your bike chain constantly falling off. The chainring is the toothed circular component at the front of your bike that the chain wraps around.
Here are some key points to consider:
- A bent chainring or damaged teeth can disrupt the smooth movement of the chain, causing it to derail.
- A bent chainring can occur due to impact from a crash, hitting rocks or curbs, or even from general wear and tear over time.
- Damaged chainring teeth can cause the chain to slip off when you apply pressure to the pedals, resulting in an unstable ride and potential accidents.
- It’s important to inspect the chainring regularly for any signs of bending or worn teeth.
- If you notice a bent chainring or damaged teeth, it’s best to replace the component to ensure safe and reliable cycling.
Remember to check for this issue if your bike chain keeps falling off. By addressing a bent chainring or damaged teeth, you can prevent further chain derailments and enjoy a smoother and more enjoyable ride.
Keep reading to discover more causes and solutions for fixing a bike chain that keeps falling off!
Stage 1. Clean The Chain And Drivetrain
Before attempting to fix a bike chain that keeps falling off, it’s important to start with a clean slate. A dirty chain and drivetrain can often be the culprit behind chain derailments. By following this stage, you can ensure that your chain and drivetrain are free from dirt, grime, and debris, which will greatly improve its overall performance.
Gather The Necessary Supplies:
- Degreaser: Look for a specific bicycle degreaser that is safe to use on chains and drivetrains. Avoid using household cleaners as they may cause damage.
- Chain brush: A chain brush with firm bristles will help you clean hard-to-reach areas on your chain.
- Rag: Have a clean rag nearby to wipe off excess degreaser and dirt.
- Water: You’ll need water to rinse off the degreaser after cleaning.
- Chain lubricant: After cleaning, you’ll want to lubricate the chain to ensure smooth operation.
Step 1: Prepare The Bike
- Place the bike on a stable surface, such as a bike stand or upside-down on a clean towel.
- Shift the chain onto the smallest chainring at the front and the smallest gear at the rear.
- This allows for easy access and thorough cleaning of the chain and drivetrain.
Step 2: Apply Degreaser
- Liberally spray the chain and drivetrain with the degreaser. Make sure to coat all sides of the chain and the rear derailleur pulleys.
- Allow the degreaser to penetrate for a few minutes, loosening the dirt and grime.
Step 3: Scrub The Chain
- Take the chain brush and scrub the entire length of the chain. Move the pedals backward to rotate the chain and ensure thorough cleaning.
- Pay extra attention to hard-to-reach areas such as the jockey wheels and cassette cogs.
Step 4: Rinse And Dry
- Using a hose or a bucket of water, thoroughly rinse off the degreaser and dirt from the chain and drivetrain.
- Dry the chain with a clean rag, removing any excess moisture.
Step 5: Lubricate The Chain
- Apply a small amount of chain lubricant to the chain, focusing on the rollers.
- Turn the pedals backward to allow the lubricant to work its way into the chain.
By following these steps and cleaning both the chain and drivetrain, you’ll be well on your way to fixing a bike chain that keeps falling off. The next stages will delve into further troubleshooting and adjustments, ensuring a smooth and reliable ride.
Stay tuned for stage 2: check chain tension and rear derailleur alignment. Get ready to get your bike back on track!
Stage 2. Regrease The Chain And Drivetrain
If your bike chain keeps falling off, you might need to regrease the chain and drivetrain. This is an important step in maintaining the smooth operation of your bike and preventing further chain issues. Here’s how you can do it:
Clean The Chain And Drivetrain
- Remove the chain from the bike by either using a quick-link tool or by breaking the chain with a chain tool.
- Use a solvent or degreaser to clean the chain thoroughly. You can use a brush or a rag to remove any dirt, grease, or grime that has built up on the chain and drivetrain.
- Make sure to thoroughly clean the cassette or freewheel, chainrings, and derailleur pulleys to ensure smooth shifting and optimal performance.
Apply Lubricant To The Chain
- Once the chain and drivetrain are clean, it’s time to apply lubricant.
- Choose a good-quality bicycle chain lubricant suitable for the conditions you’ll be riding in. Apply a few drops of lubricant to each individual chain link, making sure to cover the entire chain.
- Gently rotate the pedals backward to help the lubricant penetrate the chain and drivetrain.
Wipe Off Excess Lubricant
- After applying the lubricant, use a clean rag to wipe off any excess lubricant from the chain. This will help prevent attracting additional dirt and grime.
- Be careful not to put too much pressure on the chain while wiping, as this can cause it to come off the bike again.
Test And Adjust
- Once you’ve regreased the chain and drivetrain, test the bike by shifting through the gears and riding for a short distance.
- Keep an eye out for any signs of the chain falling off again or any other issues with the drivetrain.
- If the chain still falls off or there are other problems, you might need to seek professional help or further troubleshoot the issue.
By following these steps and regreasing your chain and drivetrain, you can prevent your bike chain from continuously falling off and ensure a smoother and more reliable ride. Remember, regular maintenance is key to keeping your bike in good working condition.
Stage 1. Check For The Number Of Rear Cogs
Before diving into fixing a bike chain that keeps falling off, it’s essential to first check the number of rear cogs on your bike. This information will help determine the appropriate steps to take in resolving the issue. Here are the key points to consider:
- Identify the number of rear cogs: Take a close look at the rear cassette, which is the cluster of gears located on the rear wheel hub. Count the number of individual cogs or gears present. This number can typically range from 7 to 12, depending on the type of bike you have.
- Understand the impact: The number of rear cogs affects the overall shifting mechanism of your bike. Bikes with more cogs tend to have narrower gaps between gears, providing smoother and more precise shifting. Conversely, bikes with fewer cogs may have wider gaps, which can lead to chain misalignment and potential issues such as the chain falling off.
- Consider compatibility: Knowing the number of rear cogs is helpful when replacing or upgrading components like the chain or cassette. It ensures that the new parts you choose are compatible with your bike’s drivetrain system.
- Seek professional advice if uncertain: If you’re unsure about how to count the number of rear cogs or need assistance in understanding the implications for your bike, it’s always advisable to consult a knowledgeable bike mechanic or visit your local bike shop.
Remember, understanding the number of rear cogs is crucial as it lays the foundation for resolving the bike chain falling off. Once you have this information, you can proceed to the next stages and tackle the issue with confidence.
Stage 2. Check The Manufacturer References
Now that you’ve completed the first stage of fixing your bike chain, it’s time to move on to the next step. Checking the manufacturer references is an important part of the process as it provides valuable information specific to your bike.
Whether you’re a beginner or an experienced cyclist, following the manufacturer’s guidelines can help you ensure that your bike chain stays put where it belongs. Here are the key points to keep in mind:
- Read the bike’s user manual: The user manual contains detailed instructions and illustrations provided by the manufacturer. It will give you insights into the specific chain components on your bike and how to properly adjust them.
- Look for online resources: Many bicycle manufacturers have online resources, including websites and forums, where their customers can find additional information. Take advantage of these resources to gain a deeper understanding of your bike’s chain mechanism and troubleshooting tips.
- Contact customer support: If you’re unable to find the information you need in the user manual or online resources, don’t hesitate to reach out to the manufacturer’s customer support. They can provide you with specific guidance tailored to your bike model.
Remember, each bike brand may have its unique specifications, so it’s crucial to consult the manufacturer’s references for accurate information. By taking the time to familiarize yourself with the manufacturer’s guidelines, you can effectively address any issues causing your bike chain to fall off.
So let’s move on to the next stage and continue troubleshooting your bike chain woes.
Tip 1. Get A Chain Catcher
If you’re tired of dealing with a bike chain that keeps falling off, then it’s time to invest in a chain catcher. This simple yet effective device can help prevent your chain from derailing and ensure a smoother and more enjoyable ride.
Here are a few key points to consider about chain catchers:
- Chain catchers are small attachments that you can easily mount on your bike frame, precisely where the front derailleur is positioned.
- Their main function is to guide the chain back onto the chainring whenever it starts to fall off.
- They are particularly useful for preventing chain drops during rough terrain or when shifting gears rapidly.
- A chain catcher can save you from the frustration and inconvenience of constantly having to stop and put your chain back on, allowing you to focus on your ride instead.
- Chain catchers come in various designs and price ranges, so you can choose one that best suits your needs and budget.
By adding a chain catcher to your bike setup, you can significantly reduce the chances of experiencing chain drops and enjoy a more reliable cycling experience. Say goodbye to those annoying chain mishaps and hello to a smoother ride!
Tip 2. Install A Chain Guide Or Chain Tensioner
Tip 2: Install A Chain Guide Or Chain Tensioner
Are you tired of dealing with a bike chain that keeps falling off? Don’t worry, there are solutions available! One effective way to prevent this frustrating issue is by installing a chain guide or chain tensioner. These handy accessories can ensure that your bike chain stays in place, allowing you to ride smoothly without any unexpected mishaps.
Here are some key points to consider when using a chain guide or chain tensioner:
- Chain guides are devices that prevent the chain from derailing by guiding it onto the chainring. They are typically mounted around the bottom bracket area, close to the crankset. With a chain guide in place, you can ride confidently, knowing that your chain will stay securely in position.
- On the other hand, chain tensioners do exactly what their name suggests—they help maintain proper tension in the chain. A properly tensioned chain reduces the chances of it slipping off the gears. Chain tensioners are often used on single-speed or fixed-gear bikes, where maintaining tension is crucial.
- When choosing a chain guide or tensioner, make sure it is compatible with your specific bike setup. Consider factors like the number of gears, chainring size, and the type of derailleur system you have.
- Installing a chain guide or tensioner may require some technical skills. If you’re unsure about the process, it’s always best to consult a professional bike mechanic for assistance. They can ensure that the guide or tensioner is properly installed and adjusted to provide optimal performance.
By incorporating a chain guide or tensioner into your bike’s setup, you can significantly reduce the chances of your chain falling off during rides. It’s a small investment that can save you from the inconvenience of constant chain derailments and make your cycling experience much more enjoyable.
Remember, prevention is key when it comes to chain-related issues. By taking proactive steps like installing a chain guide or tensioner, you’ll be able to enjoy smooth and trouble-free rides, without any worries about your chain falling off.
Tip 3. Upgrade The Drivetrain
Biking is an enjoyable outdoor activity that allows you to stay fit and explore your surroundings. However, it can be frustrating when your bike chain keeps falling off. If you’re experiencing this problem, don’t worry! There are several easy fixes to get your bike chain back on track.
In this blog post, we will focus on tip 3: upgrade the drivetrain. By upgrading your bike’s drivetrain, you can improve its performance and reduce the chances of your chain falling off. Let’s dive into the key points:
Key Points For Upgrading The Drivetrain:
- Replace worn-out components: Over time, the components of your bike’s drivetrain, such as the chain, cassette, and chainrings, can wear out and become less efficient. By replacing these worn-out parts, you can restore the smooth operation of your drivetrain and minimize chain issues.
- Choose high-quality components: Investing in high-quality drivetrain components can make a significant difference in your biking experience. Opt for durable chains, cassettes, and chainrings from reputable brands. These components are designed to withstand the rigors of cycling, ensuring a reliable and stable drivetrain.
- Consider upgrading to a wider gear range: If you frequently ride on hilly terrain or find yourself struggling to find the right gear, upgrading to a wider gear range can be beneficial. This upgrade will provide you with a greater range of gears, allowing you to tackle steep inclines or maintain a comfortable cadence on flat roads.
- Get professional help: If you’re not comfortable upgrading your bike’s drivetrain yourself, it’s always a good idea to seek professional assistance. A bike mechanic can help you choose the right components for your needs and ensure they are properly installed, minimizing the chances of any future chain-related issues.
By upgrading your bike’s drivetrain, you can address the root causes of your chain falling off and enhance your overall biking experience. Whether it’s replacing worn-out components or opting for a wider gear range, these upgrades will make a noticeable difference in the performance and reliability of your bike.
So, don’t let a falling chain deter you from enjoying your cycling adventures – take the necessary steps to upgrade your drivetrain and get back on the road with confidence!
Stage 1. Backpedal The Chainring To Check For Any Problems
If you’ve been struggling with a bike chain that keeps falling off, don’t worry, we’ve got you covered! In this stage, we’ll guide you through the process of backpedaling the chainring to identify any underlying issues that may be causing the problem.
Let’s get started!
- Check for loose or worn chainring bolts: Ensure that the bolts securing the chainring to the crank arm are tight and in good condition. Tighten any loose bolts using an appropriate wrench.
- Examine the chainring teeth for damage: Inspect the teeth of the chainring for signs of wear or bent teeth. If you notice any issues, it may be necessary to replace the chainring.
- Look out for a misaligned chainring: If the chainring appears misaligned or crooked, it can cause the chain to fall off. Loosen the bolts holding the chainring in place and adjust its position, aligning it with the other gears.
- Verify the chainring position relative to the front derailleur: If the chainring is too close or too far from the front derailleur, it can result in chain drop. Make sure the spacing between the chainring and the front derailleur is appropriate for your bike’s gear system.
- Ensure proper chain tension: A loose chain could easily derail. Check the tension of your chain and adjust it accordingly. A well-tensioned chain should have a slight amount of give.
- Clean and lubricate the chain: A dirty or dry chain can increase the chances of the chain falling off. Clean the chain with a degreaser and lubricate it with a suitable chain lubricant.
By backpedaling the chainring and checking for any problems, you’ll be one step closer to fixing that pesky chain that keeps falling off. In the next stage, we’ll continue troubleshooting and addressing other potential causes. Stay tuned for more bike chain repair tips and tricks!
Stage 2. Bend The Chainring Back Into Place
If you’ve tried adjusting the tension on your bike chain and it’s still falling off, the next step is to check the alignment of the chainring. The chainring is an essential component that connects the chain to the crankset and helps it move smoothly.
Over time, the chainring may become misaligned due to wear and tear or improper maintenance. Here are the key points to consider when bending the chainring back into place:
- Inspect the chainring for any noticeable bends or misalignments.
- Use a chainring alignment tool to assess the level of misalignment.
- If the misalignment is minor, you can gently bend the chainring back into place using an adjustable wrench.
- Ensure that the chainring is centered and parallel to the bike frame.
- Check the chain tension and adjust it if necessary.
- Test the bike by pedaling it slowly to see if the chain stays in place.
- If the chain continues to fall off, further adjustments or repairs may be required.
Taking the time to properly align the chainring can significantly improve the overall performance and reliability of your bike. By following these steps, you’ll be able to fix a bike chain that keeps falling off and enjoy a smoother riding experience.
Stage 3. Remove The Old Chainring
Now that you have successfully removed the chain from your bike, it’s time to move on to the next step in fixing a bike chain that keeps falling off – removing the old chainring. The chainring is a crucial component of the drivetrain that enables your bike to run smoothly and efficiently.
If the chainring is worn out or damaged, it can cause the chain to come off repeatedly. Follow the steps below to remove the old chainring:
- Step 1: Locate the bolts securing the chainring to the crankset. These bolts are typically found on the inside of the chainring, attaching it to the crank arms.
- Step 2: Using an appropriate size wrench or allen key, loosen and remove the bolts. Be sure to place them in a safe spot where they won’t get lost.
- Step 3: Once the bolts are removed, carefully pull the old chainring away from the crankset. Take note of any spacers or washers that may be present and keep them together with the removed bolts for reassembly.
- Step 4: Inspect the old chainring for any signs of wear or damage. If it’s severely worn or has broken teeth, it’s best to replace it with a new one.
- Step 5: Clean the area where the chainring was mounted using a brush and degreaser. This will help ensure proper installation of the new chainring and prevent any debris from interfering with its function.
- Step 6: Now that the old chainring has been removed and the area is clean, you can proceed to the next stage of fixing your bike chain that keeps falling off.
By following these steps and removing the old chainring, you are one step closer to resolving the issue of your bike chain repeatedly falling off. Keep on reading to learn how to install the new chainring and get your bike back up and running smoothly.
Stage 4. Install The New Chainring
Now that you have successfully removed the old chainring from your bike, it’s time to install the new one. This is an important step in fixing a bike chain that keeps falling off, as a worn-out or misaligned chainring can cause the chain to derail easily.
Follow these steps to ensure a smooth and secure installation:
Align The Chainring Properly
- Begin by ensuring that the new chainring is properly aligned with the crank arm. This will help prevent any potential issues with chain derailment.
- Check that the mounting holes on the chainring align perfectly with the holes on the crank arm. Any misalignment can result in shifting problems later on.
Attach The Chainring To The Crank Arm
- Once you’ve aligned the chainring, use the appropriate bolts or screws to secure it to the crank arm. Make sure to tighten them firmly but not excessively, as overtightening can damage the chainring or the crank arm.
- Depending on the type of crankset you have, you may need a specific tool, such as an allen wrench or a torque wrench, to properly tighten the bolts or screws.
Double-Check The Chainring’S Position
- After attaching the chainring, take a moment to double-check its position. Make sure it sits flat against the crank arm and doesn’t wobble or move when pressure is applied.
- Give the chainring a gentle spin to confirm that it rotates smoothly and doesn’t make contact with any other parts of the bike.
Reinstall The Crank Arm
- Once you’ve confirmed the chainring is securely in place, it’s time to reattach the crank arm. Remember to align the splines or keyways on the crank arm and bottom bracket spindle before tightening the fixing bolt.
- Use a torque wrench if necessary, following the manufacturer’s recommended torque specifications for your particular crankset.
By following these steps, you can effectively install a new chainring and ensure that your bike chain stays securely in place, preventing it from constantly falling off. Now that you have completed this stage, you are one step closer to enjoying a smooth and trouble-free ride with your bike.
Keep reading to learn about the final stage of fixing a bike chain that keeps falling off: adjusting the chain tension.
Stage 5. Test The New Chainring
Congratulations! You’ve successfully replaced your bike chain and now it’s time to test the new chainring. This stage is crucial to ensure that your chain stays in place and functions properly. Follow these steps to test the new chainring:
Step 1: Mount The Bike
Put on your helmet and mount your bike. Make sure you’re in a clear and safe area to avoid any accidents.
Step 2: Select A Test Gear
Choose a gear that allows you to pedal comfortably while simultaneously putting some pressure on the chainring. This will help you determine if the chainring is securely in place.
Step 3: Pedal Smoothly
Begin cycling and pay close attention to the chainring. Keep an eye out for any wobbling or slipping of the chain. Look for smooth movements as you pedal and make note of any unexpected sounds or sensations.
Step 4: Shift Gears
While pedaling, shift through different gears to see how the chainring performs. Pay attention to how smoothly the chain moves between the chainrings and the cassette. If you notice any issues, make necessary adjustments.
Step 5: Evaluate The Performance
After cycling for a sufficient distance, it’s time to evaluate the performance of the new chainring. Ask yourself the following questions:
- Does the chain stay in place without slipping off?
- Are there any unusual noises or vibrations?
- Does the chain move smoothly between gears?
Step 6: Make Additional Adjustments If Needed
If you encounter any issues during the testing process, you may need to make additional adjustments to the chainring. Consult a bike mechanic or refer to the manufacturer’s instructions for guidance.
Remember, a properly functioning chainring is vital for a smooth and safe ride. Don’t be afraid to seek professional help if you’re unsure about any aspect of the testing process.
Happy Cycling!
Frequently Asked Questions On How To Fix A Bike Chain That Keeps Falling Off
How Do I Know If My Bike Chain Is Falling Off?
If your bike chain keeps falling off, you may notice a clunking sound, difficulty shifting gears, or sudden loss of power while pedaling. Additionally, the chain may repeatedly slip off the cassette or chainring. These signs indicate that your bike chain is not properly engaged and needs fixing.
Why Does My Bike Chain Keep Coming Off?
There can be several reasons why your bike chain keeps falling off. These include a worn-out or loose chain, misaligned gears, a bent derailleur hanger, or excessive chain tension. Additionally, a damaged chainring or cassette teeth can also cause the chain to come off.
Proper diagnosis and repair are essential to prevent further incidents.
How Can I Fix A Bike Chain That Keeps Falling Off?
To fix a bike chain that keeps falling off, start by inspecting the chain for any damage or excessive wear. If the chain is fine, check the gear alignment and adjust as needed. Ensure that the derailleur hanger is straight, and the chain tension is correct.
In some cases, replacing the chainring, cassette, or derailleur may be necessary for a lasting fix.
Can I Prevent My Bike Chain From Falling Off?
Yes, there are preventive measures to keep your bike chain from falling off. Regularly clean and lubricate the chain, and check for any signs of wear. Maintain proper tension and alignment of the chain, gears, and derailleur. Avoid cross-chaining and sudden shifting under heavy load.
These practices will help reduce the chances of your bike chain coming off.
When Should I Seek Professional Help For My Bike Chain Issue?
If you have tried adjusting the chain tension, aligning the gears, and fixing any visible damage, but the bike chain keeps falling off, it may be time to seek professional help. An experienced bike mechanic will have the expertise and tools to diagnose and repair complex issues that may be causing the chain to constantly come off.
Conclusion
Fixing a bike chain that keeps falling off is an essential skill for any cyclist. By following the steps mentioned in this blog post, you can easily address this issue and get back to enjoying smooth rides. Remember to start by inspecting the chain and identifying any damaged or worn-out parts.
Next, clean the chain and lubricate it properly to ensure smooth movement. Don’t forget to adjust the tension of the chain to the correct level based on your bike’s specifications. Additionally, be mindful of your shifting technique and avoid putting excessive force on the chain.
Regular maintenance and proper care are crucial to prevent the chain from falling off in the future. By mastering these techniques, you can confidently tackle this common problem and make your biking experience more enjoyable. Happy pedaling!